Users Guide

DOM0 Access

Avance R4.0.0.7 release adds support for accessing DOM0.   A new user called dom0user has been added with a default password of dom0user to provide this access.  The dom0user has root privileges when using the sudo command.   Note that not all commands require root privileges.  For those that do sudo can be used.

It is strongly recommended that the dom0user password be changed immediately after upgrade as described below. Access to DOM0 using dom0user is for diagnostic purposes only.   Modifications to the base Avance product without the approval of Stratus Technologies are not supported.

  1. Attach a keyboard and monitor to either of the physical nodes
  2. Login in to the physical console with the username/password combination dom0user/dom0user.
  3. Change the dom0user password when prompted
  4. Access to the system is limited to a keyboard and monitor attached to the physcial system after upgrade. If network based access is desired then enable remote access prompted.

The pasword change and remote access enable are applied to both nodes so it is only necessary to do this from a single node.  The password will be set to the same value on both nodes.

Once these settings have been changed the user will no longer be prompted to change them at dom0user login.  Future upgrades, node replace, and recover operations will also maintain these settings.

Changing the password after initial login

Enter the following command to change the password again at any time:

  1. Login in to the console of either node
  2. Enter this command:  rm /usr/lib/dom0user/.passwdChanged
  3.  Logout
  4. Login as dom0user again.   This will once again prompt the user to change the password and once done will be applied to both nodes.

Changing remote acces after initial login

To change the remote access

  1. Login in to the console of either node
  2. Enter this command:  rm /usr/lib/dom0user/.accessChanged
  3.  Logout
  4. Login as dom0user again.   This will once again prompt the user to enable or disable remote access setting and once done will be applied to both nodes.

A sample login session from the console:

Authorized users only
Avance Unit Summary:
IP: 10.83.55.16
Gateway: 10.83.0.1
DNS Servers: 134.111.24.254
Local PM Summary:
node is primary
IPV6 link-local: fe80::226:b9ff:fe55:5fd4/64
Stratus Avance Server R4.0.0.7 (svn:58199M)
 
node1 login: dom0user
Password: dom0user
 
#############################################################
WARNING: Dom 0 login is supported for diagnostic purposes only. Do not
make any modifications to the base product. Changes to Dom 0 without
the approval of Stratus Technologies are not supported.
#############################################################
 
The dom0user password has not been changed.
Would you like to change it now? (y/n):
y
Changing password for user dom0user.
Changing password for dom0user.
(current) UNIX password:
New password:
Retype new password:
passwd: all authentication tokens updated successfully.
The dom0user password has been changed on this node.
The dom0user password has been changed on the peer node.
 
Remote access for dom0user is currently disabled.  Would you like to enable it (y/n)?
y
Remote access for dom0user will be enabled.
Successfully enabled dom0user remote access on this node.
Successfully enabled dom0user remote access on the peer node.
[dom0user@node1.avance ~]$

On future logins only the WARNING banner will be displayed. When performing a node replacement or recovery the password and remote access settings will be applied to the replaced/recovered node.  Password and remote access settings are also retained on upgrade.

Remote Node Access

Once remote access has been enabled the primary node can be accessed using putty or plink or whatever access tool the user would like.   SSH should be used.  Putty and plink can be downloaded from the http://www.putty.org site.

A few examples below:

EXAMPLE 1

A putty ssh session can be established using the IP address of the Avance Unit (can be found in the UI header):

putty_example

dom0_window

EXAMPLE 2

Using plink installed on a Windows desktop a command can be run on the primary node.  In this example the hostname command is run and returns the name of the primary node:

C:\>plink -ssh -l dom0user -pw dom0userpassword 10.83.55.16 “hostname”
 
node1

Note that the use of sudo was not required in this example.

EXAMPLE 3

C:\>plink -t -ssh -l dom0user -pw dom0userpassword  10.83.55.16 “sudo tail /var/log/messages”

May  8 12:01:01 localhost kernel: imklog 4.6.2, log source = /proc/kmsg started.
May  8 12:01:01 localhost rsyslogd: [origin software="rsyslogd" swVersion="4.6.2
" x-pid="5132" x-info="http://www.rsyslog.com"] (re)start
May  8 12:01:02 localhost PcapScrub: Scrubbed 0 files, removing 0 bytes of the 0
 bytes currently in /var/log/pcap
May  8 12:10:01 localhost init: Connection from private client
May  8 12:20:01 localhost init: Connection from private client
 

Note that the use of sudo was required in this example. The –t option is required in order to execute sudo.

EXAMPLE 4

This example shows the use of the ipmitool from a putty session to get BMC information.  In this case we are listing sensor  types:

[dom0user@node1.avance ~]$  ipmitool -v sdr type list

Sensor Types:
        Temperature                     Voltage
        Current                                Fan
        Physical Security                Platform Security
        Processor                            Power Supply
        Power Unit                         Cooling Device
        Other                                   Memory
        Drive Slot / Bay                  POST Memory Resize
        System Firmwares             Event Logging Disabled
        Watchdog                           System Event
        Critical Interrupt                Button
        Module / Board                 Microcontroller
        Add-in Card                        Chassis
        Chip Set                              Other FRU
        Cable / Interconnect        Terminator
        System Boot Initiated       Boot Error
        OS Boot                               OS Critical Stop
        Slot / Connector                System ACPI Power State
        Watchdog                           Platform Alert
        Entity Presence                  Monitor ASIC
        LAN                                      Management Subsystem Health
        Battery                                 Session Audit
        Version Change                  FRU State

EXAMPLE 5

To execute a command on the peer node from a putty session:

 
[dom0user@node1.avance ~]$ sudo ssh peer “ls /var/log/messages”
 
/var/log/messages

To execute the same command on the peer node using the plink command:

 
C:\>plink -t -ssh -l dom0user -pw dom0userpassword 10.83.55.16 “sudo ssh peer ls /var/log/messages”
 
/var/log/messages

Getting Started

Avance Management Console Requirements

The Avance Management Console provides browser-based remote management of the Avance unit, its physical machines (PMs), and virtual machines (VMs).

Installing Avance

The installation of Avance is designed to be as easy as possible. For step-by-step instructions please refer to the installation guide customized for your hardware platforms.

Logging in to the Avance Management Console

Type the Avance unit’s IP address or host name into your browser: http://IP_address –OR– http://host_name Where IP_address, is the Avance unit’s static IP address, supplied during installation, and host_name is the fully-qualified host name assigned to that IP address.

Avance Unit Preferences

When logging in the first time, click Preferences on the navigation menu and configure those options not specified during the install process:

System Preferences
Owner Information (optional) Contact information, communicated via SNMP alerts to a service provider.
Product License Upload license and activation keys. Displays the Site ID required for service calls.
IP Configuration Avance Management Console, Gateway, and DNS server IP addresses.
Date & Time Configuration Time Zones, Date & Time, and NTP servers.
Active Directory (optional) Authenticate user access via domain groups.
Hardware
UPS (optional) Power monitoring method (default is none).
Help & Debug
Diagnostics Exports a diagnostic file for use in troubleshooting.
Notifications
e-Alerts(optional, but recommended) Email alerts alert language recipients, and SMTP server name.
SNMP Alerting (optional) SNMP requests and traps, community, and list of trap recipients.
Remote Support
Call-Home & Dial-in(optional, but recommended) Call-Home automatically/securely sends alerts and diagnostics to the Stratus Active Service Network and an incident management system. Supplies the service provider with debug information.Dial-in provides a secure tunnel to the Avance unit for troubleshooting.
Proxy Configuration(optional) An explicit proxy server used when sending eAlerts or Call-Home messages outside the company’s firewall.

User Accounts

In the Avance Management Console, click Users & Groups to do the following:

  • Control domain member access to the Console.
  • Add, edit, or delete local user accounts.

For details, click Help. Starting the Avance Unit

  1. Press the power button on each Avance PM. (The shut-down Avance unit is not accessible from the Avance Management Console.) The PMs take 10–15 minutes to return to service.
  2. Log in to the Console.
  3. Click Physical Machines.

Note that the PMs run in maintenance mode until you return them to normal “running” mode.

  1. Select a PM.
  2. Click Finalize. The PM displays running under Activity.
  3. Repeat for the second PM.

After the first PM is removed from maintenance mode, any VMs that were running at shutdown automatically restart.


Shutting Down the Avance Unit

Use the Avance Management Console to shut down the Avance unit. This shuts down the VMs, then the PMs.


Use only this method to shut down the Avance unit. Make sure both PMs are running before shutting down. Other methods (such as shutting down or removing power from the PMs individually) can cause data loss.


  1. In the Console, select the unit under Avance Unit.

Click the Shutdown button. Shutdown can take up to 10 minutes. When the unit shuts down, the Console is unavailable.If the Avance unit does not shut down completely:

  • Use the VM console or a remote desktop application to log in to the VM. Use operating system commands to shut down the VM.
  • If unsuccessful, log in to the Avance Management Console. Click Virtual Machines. Select the VM. Click Power Off.

When the VMs shut down, the Avance unit continues shutting down.

Increasing Avance System Resources

Increasing the system resources of your Avance unit can improve performance of Avance and prevent it from having a performance impact on your VMs. We recommend at least 2048 MB of system memory but a system with only a few VMs may have good performance with as little as 1024 MB of system memory. Click System Resources from the Preferencespage to view or change the system resources of the Avance unit. Once you have saved your system settings, you will have to reboot each Physical Machine in succession for the changes to take affect.

Upgrading Avance Software

You can upgrade Avance software without interrupting running applications (VMs). Navigate to the Avance Upgrade Kits page in the Avance Management Console and click on the help icon.

Avance Software Upgrade Guide

Important Considerations – Upgrade

You can only upgrade to R3.X or 4.0 from R2.0.1.11 and later releases. contact Avance support if you are running a release prior to R2.0.1. Refer to Upgrading from Older Avance Releases (R2.0.1) if upgrading from R2.0.1.

  • All VMs must be stopped when upgrading from Avance R2.x to Avance R3.x or R4.0. Important: once upgrade has started, do not start any VMs until the first R3.X or R4.0 node becomes primary and all of the stopped VMs have migrated to this PM.  
  • If you updating PV drivers as part of this upgrade and you are also running a Windows VM with 3 or more drives, refer to Appendix B for important precautions you must take to avoid a non-bootable VM.`
  • If you are running Kaspersky anti-virus software then you should update to the latest Kaspersky whitelist prior to Installation of Windows PV or you risk making the VM unbootable.
  • On upgrade Avance will calculate the amount of memory used by all stopped VMs and subtract this number from the total system memory in order to calculate the available memory. Avance will automatically increase the amount of memory Avance uses to 2GB if there is sufficient available memory to do so.
  • Windows 2000 VMs are not supported in this release.
  • Windows VMs require installation of new PV drivers and the .NET Framework after upgrade from a 2.X release.  A VM reboot is required for PV driver update.
  • Linux 4.X VMs require an upgraded Avance supplied kernel
  • Linux 5.X VMs require a stock RHEL kernel of 5.4 or greater.
  • Upgrades from release R2.0.1, refer to Appendix A – Upgrading from Older Avance Releases for additional information
  • HP platforms require new HP tools for this release. You will need to upload new HP tools after kit upload but prior to starting the upgrade.
  • Use keyword “firmware” and release “3.0″ or “3.1″ to search the Known Issues database to check for any firmware incompatibilities prior to upgrade. Please note that updates to the knowledge base are currently disabled but all 3.1 firmware issues also apply to R4.0.
  • A valid service contract is required for upgrade. Refer to Avance Licensing in the User’s Guide for details.
  • Direct upgrade  from Avance R2.1.0.9 or R2.1.0.10 is not possible, please contact Avance support for further details.
  • If you are upgrading Avance to R3.X or R4.0 and also upgrading the HP P410i storage controller firmware from version 1.66, you must execute the following steps in order:
    1. Upgrade to R3.X or R4.0.
    2. Upgrade HP P410i firmware on each node in a rolling upgrade.

Step 1: Upgrading Firmware

Use keyword “firmware” and the release to search the Known Issues database to check for any firmware incompatibilities prior to upgrade. you can also reference the Avance Firmware Matrix for list of the latest validate firmware versions. Firmware versions that are blacklisted are included in the Avance Compatibility Matrix by vendor.

  1. Login to the Avance Customer or Partner Portal.
  2. Click on Search for known issues under technical support.
  3. Select release the release you are upgrading to and issue type firmware.

Install the latest versions of BIOS, BMC, storage, and NIC firmware. In some cases this can be done through the Avance Management Console (see instructions below). If the firmware for the device or platform in question is not available through the Avance Management Console then the upgrade will need to be done through the physical console. In this case, please refer to the “How To” article “How to Upgrade Firmware from the Physical Console” found on the Avance Support portal.

  1. In the Avance Management Console, click Physical Machines.
  2. Select the secondary (non-primary) PM.
  3. Select the Firmware tab.
  4. Under Device, select the device to update. (ALT in the name indicates a mirror download site.)
  5. Under Tested Firmware, click the appropriate download link and save the file. (Do not run or open it.)
  6. Click Browse. Select the downloaded file. Click Open.
  7. Click Upload.
  8. When Component uploaded successfully appears, click Work On.
  9. Click Apply Firmware.

On a device with a mirror site, Apply Firmware can appear on either device.

  1. When Firmware Update Completed appears or after 15 minutes, whichever comes first, click View Details.
  2. Review the details for errors. Click Complete Operation.

If errors occurred, Complete Operation cancels and rolls back the operation.

  1. When the machine status changes to running (in Maintenance), click Finalize.
  2. Repeat these steps to upgrade the firmware on the primary PM.

Step 2: Uploading Avance Upgrade Kits

Avance R2.1 requires Microsoft Internet Explorer IE8 or Mozilla Firefox 3.6+ for accessing the Avance Management Console. You should upgrade your browser if you are not already running an approved version.

  1. Log in to the Avance Customer or Partner Portal. Go to the Downloads page.
  2. Download the Avance software upgrade kit for the latest release. A next to a kit indicates the kit is installed on the system and cannot be removed.
  3. Go to the Avance Upgrade Kits page. Click Add a Kit.
  4. Click Browse. Select the upgrade kit.
  5. Click Open. Click Upload.

Step 3: HP Systems Only: Upgrading HP tools

Avance interacts with server vendor tools to monitor and manage hardware states. HP servers require that these tools be installed on the server as follows.

  1. In the Avance Management Console, click Avance Upgrade Kits.
  2. Select a kit. The Details tab displays packages from the HP Tools collection and whether each has been uploaded.
  3. For each package showing Not Uploaded:
    1. Download the package by clicking its URL.
    2. Click Browse. Select the downloaded package. Click Open.
    3. Click Upload.
    4. When Component Uploaded Successfully appears, click OK.
    5. Select the kit again to refresh the display.

Step 4: Upgrading Avance Software

Avance software can be upgraded without interrupting business processing (such as virtual machines).

  1. Click Dashboard. If any warning or busy symbols appear, resolve these before proceeding.
  2. Click Avance Upgrade Kits. Available upgrade kits are listed. A indicates the current version.
  3. Select the upgrade kit to install. Click Upgrade. The Avance Upgrade Wizard appears.
  4. Follow the onscreen instructions.

WARNING: Do not close the upgrade wizard until the upgrade completes. Do not shut down the PMs while they are synchronizing.


Troubleshooting: See During Install, Upgrade, Recover, or Replace, a node fails to PXE boot in the Console online help.

Step 5: Upgrading Windows Para-Virtualized Drivers

Para-virtualized (PV) network and disk drivers do the following:

  • Ensure that under fault conditions, VMs properly migrate from the failed to the operating PM (node) without interruption.
  • Significantly enhance performance for network and storage subsystems.
  • Enable use of Windows disk configurations with more than three volumes.

The Dashboard displays a warning for each VM that needs Windows PV drivers installed or upgraded. Proceed as follows for each such VM:

  1. Click Virtual Machines. Select the VM.
  2. Click the CD Drives tab.
  3. If a virtual CD other than PV drivers is inserted, click Eject CD.
  4. Select xen-win-pv-drivers-6.0.2 from the menu. Click Insert a CD.
  5. Connect to the VM with the Avance VM console or other remote desktop application.
  6. Open My Computer.
  7. Double-click xen-win-pv-drive (D:).
  8. Accept the license agreement. Type the installation path. Click Install.
  9. When prompted, click Reboot now.

Troubleshooting: See PV Drivers VCD has been deleted from Avance Management Console in the Console online help.

Step 6: Upgrading Linux kernel Patches

If upgrading from R1.5.x to R2.0.2, install new Linux RedHat Package Managers (RPMs) in each Linux VM on the Avance unit. Upgrading Linux kernel patches is not required when upgrading from R1.6.x to R2.0.2

  1. Log in to the Avance Customer or Partner Portal. Go to the Downloads page.
  2. Download the latest Linux RPMs to a directory on the Linux VM.
  3. At the Linux command prompt, type:
    rpm -ivh --force /.rpm
  4. Type
    reboot

    Press Enter.

Appendix A – Upgrading from Older Avance Releases (R2.0.1)

You can only upgrade to R3.X or R4.0 from R2.0.1 and later releases. contact Avance support if you are running a release prior to R2.0.1

Appendix B – Windows VM with three or more drives may crash after updating the PV drivers

Some Windows VMs with 3 or more total volumes crash and are unable to boot after updating to newer PV drivers. This can occur any time the PV drivers are updated, regardless of the version of Avance being upgraded from. This issue is very rare but we recommend special precautions be taken given the catastrophic nature of the issue. The crash is immediate, if the VM runs after installing the new drivers then there is no issue of a future crash due to the issue. This problem does not exist on fresh installs. Follow this upgrade procedure for systems with VMs with 3 or more drives:

  1. Stop all VMs and proceed with the Avance upgrade according to the Avance Upgrade Guide
  2. Wait for the successful upgrade of both nodes and a completely healthy system (green checked).
  3. Upgrade the PV Drivers on all VMs with 2 or fewer Volumes (including the boot volume).
    1. Disable any anti-virus software ahead of upgrading your PV-Drivers, and proceed to upgrade the PV drivers as per the instructions.
    2. Validate that each of these VMs boot after the PV-Driver update.
  4. If you have any VMs with 3 or more Volumes attached then
    1. Shutdown all VMs, including those with fewer volumes.
    2. Select the PM in the Avance Management Console and click Work On to place the secondary PM in maintenance mode.
    3. with the PM selected, click Shutdown and shut the secondary PM down. Wait for the PM to power off. The secondary PM now has a clean copy of all VMS with bootable PV drivers. This PM will be used to recover the VMs if any crash after PV driver update. Leave the secondary PM in maintenance.
    4. Install PV drivers for each VM and ensure they each boot without issue.   If any VM fails to boot with a blue screen of death proceed to Emergency VM Recovery below.
    5. Power On any remaining VMs that were already updated because they had fewer than 3 total volumes.
    6. If all the VMs now have updated PV Drivers (no PV driver alerts) and they have all successfully booted then there should be no further issues and you no longer require the VM information on the secondary node that was powered off.
    7. Once everything seems healthy power-on the secondary PM via the Avance Management Console.  The PM can then be removed from maintenance by clicking Work On. Avance will handle the re-synchronization of the data with this PM and you should be all set.  This re-synchronization may take 15-20minutes but is done in the background.

Emergency VM Recovery

  1. If you hit this step then you encountered a blue screen of death (BSOD) on one of your VMs.  Reboot this VM in safe mode and uninstall the PV drivers. Next try re-installing on the VM with a single boot drive.  This is done by shutting the VM down and detaching the data volumes in the Config wizard, booting and installing the PV-drivers then shutting down, re-attaching the data volumes and rebooting.   If this fails or you are not comfortable un-installing the PV drivers  then continue to the next step.
  2. If there are still VMs that will not boot then we recommend restarting your VMs from the secondary PM to get them back into production. To do this place the current node in maintenance mode (this will shut down any running VMs).   Disconnect the private link cable between the two PMs and shutdown the primary PM via the Avance Management Console. Next, power on the secondary PM. Once this PM returns to the running state you will get access to the Avance Management Console and you will have a quorum alert.   Force quorum to boot the VMs. This PM still has up to date data because the VMs did not run in production on the other PM. the VMs will now boot. Any VMs that got upgrade PV-Driver prior to shutting down this PM will be running the new drivers, all other VMs will have an alert indicating the PV-Drivers need to be updated.  At this point please contact Avance Support for further assistance.

Virtual Machines

Virtual Machine Page Overview

The Interface

  1. States & Activities Running, Maintenance, Off, Broken, Booting, etc.
  2. Virtual Machines Select to view, double click to rename
  3. Buttons to create, import and manage virtual machines
  4. Contextual Help and Troubleshooting.

An Avance Unit may host multiple virtual machines (VMs) running a variety of OS versions and applications. You can create and manage VMs from the Virtual Machines page of the Avance Management Console.

  1. In the Avance Management Console, click Virtual Machines.
  2. Click Create VM, Import/Restore VM install virtual machines or
  3. Select a VM to view state/configuration information or perform maintenance.
    • Click the tabs to view configuration details.

Creating VMs

The VM Creation Wizard is launched by clicking on the , from Virtual Machines page. The Wizard will step you thru the process of allocating CPU, Memory, Storage and Network resources to the VM.

Before starting the wizard please review the following materials and considerations

  1. Preparing a installation image:
    • Creating a VCD or
    • Registering Linux Repositories and Kickstart Files.
  2. Allocating Virtual CPUs
  3. Allocating Memory
  4. Allocating Storage

Linux installation reboots twice, and closes the Console window. To continue monitoring, select the VM on the Virtual Machines page. Click Console. Make sure you change the VM’s time zone to match that in the Avance Management Console. Otherwise, the VM’s time zone will change whenever VMs restart or migrate. Install the PV drivers immediately after creating a Windows VM. These drivers are needed for correct VM operation, proper VM migration between PMs under fault conditions, and good network connections.


Creating a Virtual CD

The Virtual CD Creation Wizard installs an ISO image to a storage device on the Avance unit. This image is then available to the VM Creation Wizard as a virtual CD (VCD). This procedure can also be used to create VCDs required for installing applications.

  1. Navigate to the Virtual CDs page in the Avance Management Console.
  2. Click to launch the VCD Creation wizard.
  3. Select an install source.
    • Local storage (via upload).
    • Network source.
    • Physical CDrom/DVD drive.

Exporting VMs

The Export process exports a copy of all the chosen volumes along with the VM’s configuration (stored as a OVF file). The OVF file can then be used to Import/Restore the VM image. Preparation (Windows only)

  1. Make sure that all volumes are labeled accurately as outlined in Windows Drive Labeling.
  2. Execute the Windows sysprep command.

Required Steps:

  1. Shutdown the Virtual Machine you want to export.
  2. With the Virtual Machine selected, click the Export button in the details section.
  3. Click Browse, give a name and location to store the OVF file you are about to export.
  4. Review Volumes to Capture, make edits/customizations as you see fit.

    VM Configuration Only. Choosing this will include only the configuration details of a Volume but not its data in the export file.


  5. Click Export to start the export.

Snapshots

Snapshotting is a mechanism to minimize downtime while exporting a VM. A Snapshot is an image of a stopped VM at a particular point in time, which can then be exported. How is this different from Export? Snapshot, unlike Export, creates a copy of the VM volume(s) and configuration on Shared Mirror(s) within the Avance unit. Since the process is internal the VM is down for a shorter period of time as compared to VM Export. Snapshot limitations

  • When a snapshot is created, an image of the stopped VM is created within the same shared-mirror(s) Therefore it is important to make sure that each shared mirror has at least the same amount of free space as the size volume you are trying to snapshot.
  • Snapshot can cause lag in the VM’s performance. It is recommended that you delete the snapshot soon after it has been exported.

Creating Snapshots

  1. Shutdown the Virtual Machine you want to snapshot.
  2. With the Virtual Machine selected, click the Snapshot button in the details section
  3. Select the volumes you want capture and then click Create Snapshot

Exporting Snapshots

  1. With the Virtual Machine selected, click Export in the detail section
  2. In the dialog, choose Export snapshot
  3. Click Browse, and choose a location for the export file
  4. Click Export to start the export.

Import/Restore VMs

The Import/Restore process creates a new VM, or replaces an existing VM, from an OVF file. Import assigns a new and unique hardware ID and network interface MAC addresses to the VM. Restore attempts to preserve hardware ID and MAC addresses.

Import/Restore a VM from an Avance Source

VM Import can be used to clone a VM using an existing OVA or OVF exported from an Avance unit.

  1. On the Virtual Machines page, click Import/Restore.
  2. Browse to and select the OVA/OVF export file.
  3. Review the information and make any desired edits.

    Name, CPU and Memory.In this section you can change the name of the importing VM, edit the number of VCPUs and allocate the total memory it can use. Storage.Shows all the volumes, their size and shared-mirror destinations. Check the Create box to carve out a storage container for that volume. Check the Restore Data box in order to import the data from the VM’s backup file. Network.Displays all the available networks. You can choose to remove or add one that is not already there.


  4. Click Import/Restore when you reach the end of the dialog to start importing/restoring the VM.

Import a Windows VM from a non-Avance Source

This import process creates a Windows VM from a non-Avance source from an OVF file created using XenConvert 2.1. See Windows P2V or V2V: Creating an OVF from a non-Avance source. To download XenConvert 2.1, go to the Avance Customer or Partner Portal and navigate to the Downloads page. To import, the selected OVF file (boot volume) and all associated VHD files (additional volumes) must be in the same directory, and no other VHD files can be in that directory. Windows will only recognize up to three drives until PV drivers are installed in the VM.

  1. On the Virtual Machines page, click Import/Restore.
  2. Browse to and select the OVA/OVF export file.
  3. Review the information and make any desired edits.

    Name, CPU and Memory.In this section you can change the name of the importing VM, edit the number of VCPUs and allocate the total memory it can use. Storage.Shows all the volumes, their size and shared-mirror destinations. Check the Create box to carve out a storage container for that volume. Check the Restore Data box in order to import the data from the VM’s backup file. Network.Displays all the available networks. You can choose to remove or add one that is not already there.


  4. Click Import/Restore when you reach the end of the dialog to start importing/restoring the VM.

P2V only: Disable any services that interact directly with hardware. These services are not warranted in a virtualized environment. Examples include:

  • Dell OpenManage (OMSA)
  • HP Insight Manager
  • Diskeeper

V2V only:Disable the following services:

  • VmWare tools
  • Hyper-V tools

Import a Linux VM from a non-Avance Source

The Linux import process creates a VM from a non-Avance source from an OVF file created using the open source tool G4L. See the instructions in the Linux P2V or V2V section of the Avance P2V, V2V and VM Cloning guide available from the Download page at http://avance-productinfo.stratus.com.

Windows Based VMs

Installing Windows Para-Virtualized Drivers

Avance includes “para-virtualized” (PV) network and disk drivers designed to maximize Windows VM performance:

  • Significantly enhance performance for network and storage subsystems.
  • Enable use of Windows disk configurations with more than three volumes.
  • Ensure that under fault conditions, VMs properly migrate from the failed to the operating PM (node) without interruption.

Installing or upgrading para-virtualized (PV) drivers is required for the proper operation of a Windows virtual machine (VM) on an Avance system. You can accomplish this by inserting the xen-win-pv-drivers-x.x.x CD into the virtual machine and then logging into the VM to AutoPlay/AutoRun the CD drive (normally D:) by double-clicking or right-clicking the drive in an Explorer window. AutoRun executes the AvanceXenSetupAssistant which will guide you through the installation (or upgrade) of PV drivers on a VM. Procedure:

  1. In the Avance Management Console, click Virtual Machines.
  2. Select the Windows VM.
  3. Click the CD Drives tab.
  4. Click Eject CD to remove any CD listed.
  5. Select xen-win-pv-drivers—x.x.x. Click Insert a CD.
  6. Connect to the new Windows VM using the Avance Management Console’s VM console or another remote desktop application, such as Windows Remote Desktop Connection.
    • To use the VM console: Click Virtual Machines. Select the VM. Click Console.
  7. In the Windows VM, open My Computer.
  8. Double-click on xen-win-pv-drive (D:) to AutoRun the AvanceXenSetupAssistant. See discussion below.
  9. Accept the license agreement.
  10. Type the installation path. Click Install. The Reboot now prompt appears.
  11. In the Avance Management Console, click CD Drives. Click Eject CD.
  12. When prompted, click Reboot now. Click Finish. Do not delay restarting.

The virtual disk volumes appear in the VM and are used as if they were physical disks. For more information, see “Windows VMs: Accessing Newly-Created Disks“. Microsoft’s .NET framework (version 3.5 or 4) must be installed on a VM in order to install the PV drivers. If there are no pre-installed versions of .NET on your VM, the AvanceXenSetupAssistant will attempt to install .NET 4 automatically for you and then proceed with the PV install. However, if AvanceXenSetupAssistant detects that .NET is already installed it will not modify .NET and will proceed directly with PV install. If PV install subsequently fails then messages will appear when XenSetup.exe is run by AvanceXenSetupAssistant. To fix this, you will need to install or upgrade .NET 3.5 or 4 manually and then restart the AutoRun process. Note 1: Recent versions of Windows 2008 or Windows 7 may confuse AvanceXenSetupAssistant and may appear to have a pre-installed .NET installation when there is none. Please consult Microsoft documentation on proper procedure for installing or upgrading .NET on your VM and then perform the AutoRun again. Note 2: Avance provides the .NET 4 installer on the xen-win-pv-drivers CD. You can double-right-click on the dotNetFx40_Full_x86_x64 file to start the .NET 4 installer if you decide to use .NET 4 on your VM. If this succeeds, return to step 8, above. If .NET installation fails, please see note 3. Note 3: A Windows 2003 or Windows XP VM may require that the Windows Imaging Component (WIC) be installed prior to the .NET installation. You can double-right-click on the wic_x86_enu or wic_x64_enu file to install WIC on your VM (only one of these will match your VM, but starting the other one is harmless). After WIC is installed, the .NET 4 installer can be run (return to note 2).


If you install a Windows Server 2008 VM, disable hibernation (enabled by default in some cases).


Accessing Newly-Created Disks

To format new drives

  1. Use a remote desktop application to connect to the VM.
  2. Select Start >Administration Tools>Computer Management.
  3. Select Disk Management.
  4. If the Initialize and Convert Disk Wizard does not start, right-click a disk and select Convert to Dynamic Disk.
  5. If prompted to initialize disks, select the disks. Click Next.
  6. When prompted, select the virtual disks to convert to dynamic disks. Click Next.
  7. Click Finish to start creating volumes.

To create a new volume Windows disk volumes in the VM are created on the virtual disk volumes defined when you created the VM.

  1. Use a remote desktop application to connect to the VM.
  2. Select Start >Administration Tools>Computer Management.
  3. Right-click the virtual disk on which to create a volume. Select New Volume from the menu.
  4. Click Next
  5. Select the volume type. Because Avance is already mirroring data at the physical level, volume redundancy is not required.
  6. Select the virtual disk volumes to allocate to the new VM.
  7. Select volume format settings. Click Next.
  8. Review your selections. Click Finish. The new volume appears in Disk Management.
  9. Restart Windows

Installing Applications on Windows Virtual Machines

You can install applications on a Windows VM from the network, or from an Avance VCD created from an application CD/DVD (see “Creating a VCD“).


Each VCD consumes disk space. Consider deleting VCDs when finished with the installation.


Installing Applications from a VCD

  1. In the Avance Management Console, click Virtual Machines.
  2. Select the VM. Click the CD Drives tab.
  3. Click Eject CD to remove any CD listed.
  4. Select the VCD installer for the application. Click Insert a CD.
  5. Connect to the VM from the Console or a remote desktop application.
  6. The installation CD is in the VM’s CD drive. Install the application following the vendor’s instructions.
  7. When installation is complete, return to the Avance Management Console. Click Eject CD.

Linux Based VMs

Creating a Linux Repository

As an example of how to create a repository, the following steps describe how to create a CentOS repository, from a distribution on CDs, on a Linux server running Apache.

  1. If it does not already exist, create a directory to mount the CD-ROM as follows:
    $ mkdir -p /mnt/cdrom
  2. Create a centos directory in the Apache Web root directory. For example, for RedHat® Linux, create the /var/www/html/centos directory:
    $ mkdir /var/www/html/centos
  3. Mount and copy each of the 4 CDs to the directory you just created:
            $ mount /dev/cdrom /mnt/cdrom
            $ cp –rf --reply=yes /mnt/cdrom/* /var/www/html/centos

    Repeat this step for the remaining CDs.

Registering Linux Repositories and Kickstart Files

If your installing a Linux based VM and you wish utilize a repository source:

  • Please review your operating system documentation for information on creating, modifying, and using repositories and kickstart files
  • Make sure the PMs have network access to the required repositories.
  • Identify web-based Linux repositories containing the required third-party software images. For example, CentOS maintains repositories at http://vault.centos.org/.
  • Optional: Create a Linux repository and include with the repository kickstart files. For details, see Creating a Linux Repository
Registering Linux Repositories
  1. In the Avance Management Console, click Linux Repositories.
  2. Click Add a Repository.
  3. Type the URL for the repository location.
  4. Click Finish.
Registering a Kickstart file for a Linux Repository
  1. In the Avance Management Console, click Linux Repositories.
  2. Click Add a Kickstart.
  3. Use Select a Repository to select the repository for which you are specifying a kickstart file. Only repositories registered with Avance are listed.
  4. Type the Location of Kickstart File (URL) in the form of an URL.
  5. Type a Name of Kickstart.
  6. Type a Description of Kickstart.
  7. Click Finish.

Applying Linux Kernel Patches

If you installed a Linux VM, see the Avance Compatibility Matrix to find supported Linux releases.

  1. Use the Downloads tab to obtain needed kernel patches (source or binary packages).
  2. Type these commands:
          rpm -ivh --force kernel-patch-file_name.rpm
    reboot

    Where

    kernel_patch_file_name.rpm

    is the downloaded patch file.

  3. To install kernel patches at the same time as a VM:
    1. Add the patches to the repository and kickstart file.
    2. Add this command to the post section of the kickstart file:
       rpm –i server_name/ kernel-patch-file_name.rpm

      Where

          server_name

      is the repository server.

Creating Disk Volumes in Linux Virtual Machines

To create a new volume in a Linux VM, use the volume management tool or edit files as needed to create volumes in a Linux VM. See your Linux documentation for complete instructions.


In Linux VMs, disk device names are /dev/xvda through /dev/xvdh, instead of the standard /dev/sda through /dev/sdh.


The virtual disk volumes appear in the VM and are used as if they were physical disks.

Installing Applications in Linux Virtual Machines

You can install Linux applications only from a network. Use a remote desktop application to connect to the VM from a management PC and install the application.

Provisioning Virtual Machine Resources

Allocating Virtual CPUs

A virtual CPU (VCPU) is defined as:

  • A single physical CPU thread, when Hyper-threading is enabled
  • A single physical CPU core, when Hyper-threading is disabled.

Avance supports a maximum of 8 VCPUs per VM. The total number of VCPUs available for multiple VMs running on the Avance unit is dependent on the number of CPU sockets, cores per socket and Hyper-Thread configuration. When Hyper-threading is enabled, Avance will allow you to over-provision by two VCPUs (physical CPU threads). These are the two VCPUs dedicated for the Avance software. Example: Server has two sockets with six cores per socket and two threads per core:

24 Total Available VCPUs
-2 VCPUs dedicated for Avance software
22 VCPUs available for VMs (Recommended)
24 VCPUs available for VMs (over-provisioned)

When Hyper-threading is disabled, the user can over-provision by more than 2x the number of VCPUs (physical CPU cores). Example: Server (PM) has two sockets with six cores per socket and Hyper-Threading is disabled.

24 Total Available VCPUs
-2 VCPUs dedicated for Avance software
10 VCPUs available for VMs (Recommended)
24 VCPUs available for VMs (over-provisioned)
Considerations When Over-Provisioning Virtual CPUs

In general Stratus recommends you avoid over provisioning CPU resources. You should only over-provision physical CPUs under the following conditions:


The peak VCPU resources consumed by the combined VMs does not exceed the physical resources of the Avance unit.


  • One or more VMs are used at different times (such as off-peak backups).
  • Peak total CPU use by VMs will not affect service level agreements or required response times.
  • Each VM’s CPU use is well understood, and its application(s) are not prone to resource leaks. When CPUs are over-provisioned, a leak in one VM can affect the performance of other VMs.

If the unit’s capacity is exceeded, each VM is allocated a share of the physical processing capacity proportional to its allocated share of virtual processing capacity. The only way to divert more processing to a specific VM would then be to shut down one or more of the other VMs. To view the Avance unit’s VCPU allocation, click the unit name in the Console. Look at CPU & Memory. CPU utilization per VM can also be viewed on this page by clicking show details under statistics.


Limitations in Windows 2000 cause the Avance Management Console to report inaccurate CPU use, usually too heavy. Instead, use the performance monitoring tool in Windows 2000.


Allocating Memory

Avance does not allow over-provisioning of memory for running VMs. The total memory that can be allocated to VMs is equal to the total physical memory of the PMs, minus 1 GB for the OS. In addition, if the PMs have different physical memory capacities, Avance defines the maximum memory to equal that of the PM with the least memory. For example, if PM1 has 16 GB memory and PM2 has 8 GB, the memory available for allocation to VMs would be:

8 GB (least memory of either PM) – 1 GB for OS = 7 GB

The minimum virtual memory allocation is 256 MB, but 64-bit operating systems require at least 600 MB. If a VM is shutdown, its memory is freed up and can be re-provisioned to other running VMs. However, if that VM is to be returned to service, you must first shutdown or re-configure another VM to free the needed memory again.

Allocating VM Storage

How you allocate storage can have a dramatic impact on system performance and your ability to fully utilize available capacity. Please map out your storage allocation applying the following considerations.

  • Minimize stranded storage: Since Avance volumes cannot span storage groups, plan volume assignments to minimize unusable “stranded” storage. This maximizes free space for new VMs and VCDs.
  • Maximum Volumes: The Avance unit can have no more than 62 total volumes for VMs and VCDs
  • Leave space for additional VCDs: Leave at least 5 GB of free space in each storage group to allow room to create VCDs for installing additional VMs/Applications.
  • Separate boot and data volumes. Separating the boot and data volumes helps preserve the data and makes it easier to recover if the boot volume crashes. Consider putting all boot volumes on one disk, with associated data in separate volumes.
  • Balancing storage utilization:
    • Click Storage Groups in the left navigation window and select a storage group.
    • Click on the Statistics tab and select the desired Time Span to determine the read/write bandwidth demands on each storage group. Place the new volumes in the group with the lowest demands.
    • Click on the Volumes tab to review the VM volumes assigned to the group. You can change the sorting on each column and re-order the columns as required.

Allocating Network Resources

Avance pairs physical network ports across the two PMs to form a redundant virtual network interface (VIF). One or more VIFs can be assigned to each VM, and multiple VMs can use the same VIFs. Avance allows unlimited over-provisioning of network resources, so be sure to profile a VM’s network bandwidth/response time requirements before allocating VIFs. There is no way to proportionately allocate bandwidth resources between VMs sharing a VIF. Therefore, high use of network resources by one VM can reduce the performance of all VMs on that network. If a VM has a large bandwidth requirement, consider adding a dedicated NIC for that VM.

Virtual Machine Actions

When you select a VM, the following action buttons can appear, depending on the VM’s state and activity.

Icon Description
Boots the selected VM.
Boots a VM from the selected virtual CD.
Opens a console for the selected VM.
The Exportprocess stores the image of a Windows or Linux VM into a set of OVF and VHD files. These files can then be used as a template for importing, cloning a VM onto Avance units.Open Virtual Machine Format (OVF) is an open standard for packaging and distributing physical or virtual machine data. The OVF format contains meta-data information about the VM.A Virtual Hard Disk (VHD) is a file that contains the virtual disk information.The VM must be shutdown prior to initiating the export
Shuts down the selected VM.
Immediately stops processing in the selected VM and destroys its memory state. Use this only as a last resort, when the VM cannot be successfully shutdown.
Launches the VM Re-Provisioning Wizard. The VM must be shutdown prior to launching this wizard.
Permanently deleted the VM and (optionally) its attached data volumes.
When a VM crashes, Avance automatically restarts it, unless it has fallen below its meantime between failure (MTBF) threshold. If the VM is below the MTBF threshold, Avance leaves it in the crashed state. You can then click this to restart the VM and reset the MTBF counter.
Immediately stops processing of the selected VM, creates a dump of its memory state, and restarts the VM. Use this button only at the direction of your service provider, and only for troubleshooting a hung VM.

Actions Available During Virtual Machine States and Activities

State Activity Enabled Commands Description
Busy Installing Avance software is installing the boot volume for a new VM.
Stopped Start Config Export Boot From CD Remove VM has been shutdown or powered off.
Booting Console Power Off Dump VM is starting.
Running Console Shutdown Power Off Dump VM is operating normally on redundant physical machines
Alert Running Console Shutdown Power Off Dump VM is operating normally, but is not running on fully redundant resources.
Stopping Power Off Remove VM is being shut down in response to the Shutdown action, or when the remaining physical machine is transitioning into maintenance mode.
Crashed VM crashed and is restarting. If enabled, e-Alerts and Call-Home messages are sent.
Critical Crashed VM crashed too many times and exceeded its MTBF threshold. The VM is left in a crashed state until Reset Device is clicked.
Dumping Power Off Harvesting crash dump.

Re-provision Virtual Machines

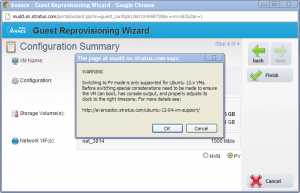
Use the VM Re-Provisioning Wizard in the Avance Management Console to reconfigure virtual CPUs, memory, storage volumes and networks assigned to the VMs. The Wizard displays current allocations. Modify these or leave unchanged as needed. You can also finish re-provisioning anytime the Finish button is available.

  1. In the Avance Management Console, click Virtual Machines.
  2. Select the VM. Click Shutdown.
  3. When the VM status shows stopped, click Config. The VM Re-Provisioning Wizard opens.

    Carefully review all changes prior to clicking Finish as they cannot be reversed after that point in time. Do not allocate less than 256 MB (600 MB for 64-bit systems). Windows 2003 or earlier: If allocating more than 4GB of memory to a VM, make sure your installation supports PAE mode. If you are changing the number of assigned VCPUs in a Windows VM from 1 to n or n to 1, after restarting the VM at the end of the re-provisioning process, you must then shutdown and restart the VM again. This allows the VM to correctly reconfigure itself for Symmetric Multiprocessing (SMP). The VM displays odd behavior and is not usable until it is rebooted.


Re-configuring Volumes:
  • Add new volumes or attach existing volumes by clicking Create another volume.
  • Click Detach Volume to disconnect a volume from the VM while preserving its data for future use.
  • Click Delete Volume to permanently delete the volume and all associated data. Keep Volume undo’s the delete.

Note: You cannot detach or delete boot volumes.

Assigning Specific MAC Addresses to VMs:

Note: It is recommnend that you do not override auto-assigned MAC addresses. This step should only be required in specific cases where a specific MAC address is required, for example on VMs with software that is licensed on a MAC address basis.

  1. Start the Reprovisioning Wizard
  2. Step through the wizard till you reach theNetworks page. Here you can view and change the MAC addresses.
  3. click Finish

Recovering Virtual Machine Resources

To conserve storage space, remove VMs, volumes, and VCDs when no longer needed. You may also need to immediately recover storage when less storage is available than required for certain activities, such as creating a volume or VCD.

Removing VMs and Data Volumes
  1. In the Avance Management Console, click Virtual Machines.
  2. Select the VM to remove
  3. Click Shutdown.
  4. When the VM shows stopped, click Remove.
  5. Select any attached data volumes to remove. The boot volume is always selected. You can leave data volumes for archiving or use by another VM.
  6. Click Delete VM.
Cleaning Up Virtual Disk Volumes

Before deleting disk volumes, check with the administrator or other users to make sure the volumes are not being purposely saved.

  1. In the Avance Management Console, click Volumes.
  2. Note any volumes marked None in the VM column. These are not associated with a VM and so are unused.
  3. Select any unused volumes to delete.
  4. Click Remove.
Cleaning Up Unused VCDs
  1. In the Avance Management Console, click Virtual CDs.
  2. Note any VCDs showing in the Can Remove column
  3. Select a removable VCD.
  4. Click Remove.

Booting from a VCD

  1. In the Avance Management Console, click Virtual Machines.
  2. Select a VM. Click shutdown.
  3. When the VM status shows stopped, click Boot from CD.
  4. Select the VCD to boot from. Click Boot.

    A VM booted from CD boots as a hardware virtual machine (HVM), and can access only the first three disk volumes.


Troubleshooting Unresponsive VMs

If a Windows VM does not respond to application requests, you can dump its memory to a file for use in troubleshooting.


Windows must be configured to generate crash dump files. See the Microsoft article, How to generate a complete crash dump file or a kernel crash dump file by using an NMI on a Windows-based system (Article ID: 927069). Follow the instructions in “More Information.”


  1. In the Avance Management Console, click Virtual Machine.
  2. Select the unresponsive VM.
  3. Click Dump.
  4. Retrieve the dump file:
    • For Windows VMs: C:WINDOWSMEMORY.DMP.
    • For Linux VMs: dump files are not stored in the Linux file structure. Retrieve the dump file by generating a diagnostic file on the Preferences > Diagnostics page of the Avance Management Console (refer to the online help for instructions). Select Dumps or Full.

Rhel/Centos 6.x VM Support

Overview

Avance R3.1 has added supports 32- and 64-bit versions of RHEL and CentOS 6.1, 6.2, and 6.3 VMs.  These OS distributions can be installed from their .ISO media (via virtual CD), as provided by Red Hat or CentOS.    These new Linux types are installed from a Virtual CD and have their own Type that must be selected in the VM create Wizard.  Starting with RHEL and CentOS 6.1, the vendors now include Xen-aware disk and network device drivers (xen_blkfront and xen_netfront).  This allows Avance to support these Linux installations directly from the vendors’ media.  Installing a VM from virtual CD is simple and familiar to administrators who normally install Linux on bare-metal machines.  Graphical or text-mode installations can be completed interactively using the VNC console  which is automatically started when a new VM is created.

Post-installation

RHEL/CentOS R6.x VMs may suffer severe network blackouts under fault conditions if their network stacks are not configured properly.   A script is provided which modifies a default network setting to solve this issue.  It can be downloaded from the Avance Web Site and executed directly from the VM console as root.   Alternatively you can execute the following command from your VM directly:

curl  http://download.avancehelp.com/linux-patches/blackout.sh | bash

Hardware Restrictions:

The RHEL/CentOS R6.x VMs have the following limitations:

  • 2GB is the minimum memory configuration for the operation of these new Virtual Machines.  Smaller memory configurations may encounter installation hangs.
  •  At most, 3 virtual disks can be used by these new VMs.  Attempts to configure RHEL/CentOS 6.3 guests with more than 3 disks will not result in more disks being available to the VMs.

Ubuntu 12.04 VM Support

Avance version 3.1.1.x adds support for Ubuntu 12.04 Virtual Machines.    Prior to this release, Avance ran all CentOS/Rhel 4.x and 5.x releases as paravirtualized (Xen-PV) VMs, and CentOS/Rhel 6.x VMs in full hardware virtualization mode (HVM).   Ubuntu is the first VM supported by Avance that requires installation in HVM mode and then a conversion to Xen-PV mode.   The remainder of this document describes special considerations for Ubuntu VMs, and the procedure for converting them to Xen-PV mode.

Special Considerations for Ubuntu VMs

There are special considerations for Ubuntu VMs that are necessary to ensure it can be properly converted from HVM mode to Xen-PV mode.  To install a Ubuntu 12.04 VM,  you need to create a VCD from either the 64-bit or 32-bit ISO provided by the Vendor.    On the second page of the creation wizard,  be sure and select “All other Linux Distributions”.    After completing each step of the creation wizard, the VM is created and you will be presented the standard Ubuntu installation screen in a newly opened console window.   There are three special considerations:

  1. The boot, grub, and initrd files must be installed on the first partition of the first logical disk.   This is the default location during a Ubuntu install.  Ignoring this step will result in the VM failing to boot after converting it to Xen-PV mode and will require that the VM be destroyed and re-created.
  2. The VM must be setup to accept its clock source in UTC format, which is the default option for a Ubuntu install.   This can be corrected after the initial install by ensuring that  ”UTC=yes”  is set in the VMs /etc/default/rcS configuration file.
  3. The last step is required to ensure you continue to get console access from the Avance management portal after converting your VM to Xen-PV mode.   After completing the installation in HVM mode, log into the newly created VM before you convert it to Xen-PV mode, and copy and paste the file below into /etc/init/hvc0.conf.

—– cut here —

# hvc0 - getty
#
# This service maintains a getty on hvc0 from the point the system is
# started until it is shut down again.

start on stopped rc RUNLEVEL=[2345] and (
            not-container or
            container CONTAINER=lxc or
            container CONTAINER=lxc-libvirt)
stop on runlevel [!2345]
respawn
exec /sbin/getty -8 38400 hvc0

—– cut here —-

Converting to Ubuntu VMs Xen-PV Mode

After completing the initial installation, and taking care to follow the special considerations for Ubuntu VMs you are ready to convert your VM to Xen-PV mode.   Failing to perform this step will prevent the VM from reliably migrating  between nodes under all conditions and can result in corrupted data when recovering from unexpected failures.  To make  the conversion, you must select the VM on the Virtual Machines page of the management portal and click  the SHUTDOWN button.   Once the VM is stopped you need to click the Config button to  launch the Reprovisioning Wizard.   In the wizard, you need to click NEXT to skip forward until you get to the 4th page of the installation wizard.  At this point you will see an option at the bottom of the page to select PV.   When you select this option,  you will receive a prompt to ensure you followed the special instructions on this page before proceeding.

Reprovisioning-HVM-Wizard

After reading and acknowledging the warning, hit OK and then accept all of the changes by clicking the Finish button in the top right hand corner of the wizard.    At this point, the VM is converted to Xen-PV mode which takes effect on the next boot.

Supported PV Kernels for Linux VMs

Avance-patched Linux kernels provided  with older releases of Avance are no longer compatible. Update your Linux kernel to one that is compatible with Avance R3 and Citrix XenServer 6.0.

RHEL/CentOS 5.x Virtual Machines

Linux VMs running the stock kernels distributed with RedHat and CentOS versions 5.4 or newer are fully compatible with Avance. No updates required.

Older RedHat and CentOS versions 5.0 – 5.3 shipped with kernels that are not compatible and must be updated. Also, Avance-patched Linux kernels from earlier Avance versions are  no longer compatible and must be updated.

Updating 5.x Linux Kernels

If your kernel is not compatible with Avance/Xen or you want to take advantage of kernel bug fixes and security updates, we recommend that you update the kernel on your Linux VM to the latest provided by your Linux vendor (e.g. RedHat or CentOS).

Step 1: In the Linux VM, run the following command as the root user:

# yum update kernel

Note: You will be prompted to download and install the latest kernel. Enter y to confirm the update.

Step 2: Reboot the VM to complete the kernel Installation.

RHEL/CentOS 4.x Virtual Machines

IMPORTANT: RedHat / CentOS 4.x VMs must be running the latest patched kernel for R3.x – older patched kernels from Avance R2.x are no longer supported and must be updated.

Update/Install 4.x to the latest kernel

Step 1: Download the following supported Linux kernel RPM and save it on your Linux VM.

Step 2: In the Linux VM, run the following command as the root user:

# rpm –i ––force rpm-file

Note: Replace rpm-file with the name of the kernel RPM file you downloaded.

Step 3: Finally, reboot the VM to complete the kernel Installation.

Split-Site Configuration

Placing physical machines in separate sites protects against loss in local disasters.
Follow these Private and Sync Link requirements:

  • NICs, fiber converters, and switches in the private network must be non-routed, non-blocking, dedicated, and provide 100MB (Private only) and 1000MB transfer rates.
  • Roundtrip latency must not exceed 10 ms. Calculate latency at 1 ms for each 100 miles of fiber, and less than 1 ms for each non-routed, non-blocking switch.
  • No general business or management traffic.

Also see Split-Site considerations in Avance Network Requirements.

Physical Machines

Physical Machine Page Overview

The Interface

  1. States & Activities
    Running, Maintenance, Off, Broken, Booting, etc.
  2. Primary node generally runs all VMs
  3. Click to perform PM Maintenance
  4. Online Help and Troubleshooting

An Avance Unit consists of two physical machines (PMs), which can be managed from the Physical Machines page of the Avance Management Console.

  1. In the Avance Management Console, click Physical Machines.
  2. Select a PM to view state/configuration information or perform maintenance.
  3. Click the tabs to view configuration details, or to upgrade PM firmware (Dell, HP servers only).

If the Avance Management Console is not available, use the Avance Emergency Console to view partial configuration information, or to extract a diagnostic file for troubleshooting PM failures.

  1. Attach a keyboard and monitor to the PM and press Return.
  2. Login: User & PW = avance.
  3. Select Display system info. Click OK.

Managing Physical Machines

Avance displays PM management commands according to the PM’s state and activity, as described in the following pages.


To ensure proper workflow, perform all PM maintenance through the Avance Management Console. Otherwise application downtime or degraded operation can result.


Managing Physical Machines

Avance displays PM management commands according to the PM’s state and activity, as described in the following pages. To ensure proper workflow, perform all PM maintenance through the Avance Management Console. Otherwise application downtime or degraded operation can result.

Commands Description
VMs running on this PM migrate to the other PM if in service. (Otherwise, re-confirm request and shut down VMs.) When VMs are migrated or shut down, displays running (in Maintenance).
The following actions are available once a PM is placed in maintenance mode (via the Work On button)
Returns PM to running state.
Shuts down PM. transitions to off (in Maintenance).
Analogous to disconnecting power cord. Use only if shutdown fails. Transitions PM to off (in Maintenance).
Re-images and recovers corrupted PM.
Use when replacing PM or motherboard.
The following action is available after Avance has removed the PM from service and powered it off because an excessive failure rate.
PM failed three or more times with a mean time between failure (MTBF) of less than an hour.This action resets the MTBF counter so the PM can be brought back into service.
The following action is available when Avance is in the process of imaging or recovering a PM.
Use to cancel imaging if recovery or replacement is not progressing. Troubleshoot, then restart recovery or replacement.

Other PM states and activities

State Activity Avaliable Commands Description
imaging Work On PM is loading Avance image.
Evacuating Finalize VMs are migrating from this PM to its partner.
Running Work On PM is predicted to fail.
Running Work On PM failed.
Powered Off Work On Reset Device Avance has powered off the PM because of an excessive failure rate.
Booting Finalize Power Off PM is booting.

Avance Storage Redundancy

Avance Virtual Machine Volumes

VM volumes (boot and data) are assigned to Avance Storage Groups defined as shared mirrors. Avance forms shared mirror groups by pairing logical disks from both PMs, and synchronously replicating VM block writes across paired logical disks.

This effectively creates RAID 1 mirrors (shared mirrors) across the PMs, enabling either PM to host VMs without external shared storage. Furthermore, if a PM’s logical disk fails, the VMs can keep running by using the mirror storage on the other PM. Avance automatically re-synchronizes logical disks after a repair or upgrade.

Reduce PM storage costs by configuring logical disks (used by VMs) as single- or multi-disk RAID0 arrays.

Avance System Volumes (Partition)

Each PM must be set up with a highly available Avance system volume (partition).

Avance requires each physical disk to be part of only one logical disk. To simplify maintenance, set up physical and logical disks identically on each PMs.

PMs with single logical disk
Storage Redundancy:

  1. Avance system partition is protected via a RAID 1, 5, 6 or 10 logical disk.
  2. VM volumes synchronously mirrored between PMs.
  3. VM volumes re-synchronized after logical disk repair or upgrade.
  4. Logical disk can host multiple VM volumes.

Key Requirements:

  1. Requires at least 2 physical disks.
  2. RAID0 is not supported in this configuration.
PMs with multiple logical disks
Storage Redundancy:

  1. Avance installs and mirrors system volumes on first two logical disks within PM.
  2. VM volumes synchronously mirrored between PMs.
  3. VM volumes re-synchronized after logical disk repair or upgrade.
  4. Logical disk can host multiple VM volumes.

Key Requirements:

  1. Each physical disk is part of only one logical disk.

Enhanced Storage Protection

Overview

By default, Avance provides protection against disk faults.   In version R3.1 and greater you can also gain protection against catastrophic storage controller failures by enabling the Enhanced Storage Protection feature. Enabling this feature allows VMs to migrate gracefully to the other PM in the event of a storage controller fault.

Enabling/Disabling

Currently this feature is only available on Dell systems with at least 32 GB of memory on each PM,  and at least 12GB of memory free that is not assigned to running VMS.   Enabling this feature will result in the additional allocation of 12GB of memory for the Avance/Xen management stack.  There are two ways in which the feature can be enabled.

  • During Installation
    If your machine meets the minimum requirements mentioned above, you will be able to enable the Enhanced Storage Protection feature at the Configuration screen.
  • Post Installation
    In the Avance Management Console, go to the Preferences > System Resources page and click Enable or Disable under Enhanced Storage Protection.   Regardless of whether the feature is enabled or disabled each PM requires a reboot in order for the new settings to take affect.    This is referred to as a “Rolling Reboot”.    In R3.1 there is a new Rolling Reboot button at the Top-Level Unit page.   This will cycle through each PM to do a reboot by placing each in maintenance mode.   Note that the VMs will continue to run through a rolling reboot since one PM is always up and running.

Recovery

Avance is capable of recovering from any single physical or logical disk failure gracefully.   However, in the event of the loss of your system disks or a catastrophic controller failure the system will need to be placed in maintenance, repaired, and the “Recovered” via the Avance Management Console.

HA Load Balancing

Overview

HA Load Balancing is a new feature that was added in R3.1, which allows you to distribute VMs  across both PMs to improve performance and availability.   It is a preference that can be enabled on the Preferences > System Resources page of the Avance Management Console.  The load balancing is configured per VM and can be done automatically or by user assignment.  If a PM is out of service all VMs will run on the surviving PM.  VMs will automatically migrate back as soon as the PM they are targeted to run on is returned to service and fully synchronized.

Enabling/Disabling

  1. Go to the Preferences > System Resources > page.
  2. Click enable or disable under HA Load Balancing
  3. And Save settings.

When HA Load Balancing is enabled from the Preference page, Avance will detect if the VMs can be automatically balanced and prompt the user before proceeding.   If you click “YES” it will immediately trigger VM migrations to balance the system.  If you prefer to manually assign VMs or defer the migrations for a later time then you can simply click “No” at the prompt.

Note: that if you are upgrading to release R3.1 then you must re-activate your license to enable this feature. This will automatically occur in the first 24 hours of operation if your Avance system is connected to the internet or can be done manually as explained on the license page.

Modes of Operation

VM Load balancing is set for a VM on its HA Load Balance tab on the Virtual Machines page.  The following mechanisms are supported:

  • Automatic Load Balancing of VMs. This is an even distribution of VMs across both PMs. When enabled, this feature will generate an alert on the dashboard and a Load Balancing notification on the masthead. Click Load Balance to initiate automatic Load Balancing of VMs. The balance icon on the Virtual Machines page under Current PM column indicates VMs that will migrate imminently.
  • Manual Load Balancing of VMs. Users with better knowledge of how their VMs are being used can manually assign a preferred PM for each individual VM, rather than relying on the Automatic policy.
  • Automatic/Manual Load Balancing of VMs. The user can manually place one or more VMs on a specific PM and use the Automatic policy for the remaining VMs.

The following visual aid has been added to the Virtual Machine Page for each VM, and illustrates the current status of your VM’s load-balancing state.  It provides a quick reference for where the VM is currently running as well as its preference.

Avance policy will ensure that a VM is always running.    In the event that one PM is predicted to fail, under maintenance or taken out of service, the VM will run on the healthy PM.    When both nodes are healthy a VM will always migrate to its preferred PM.

Performance/Availability Advantages

Enabling HA Load Balancing can result in improved overall system performance of your Avance deployment

  • During normal operations, the computing resources of both servers can be used
  • Load balancing speeds VM migration times
  • Distributes disk reads across both nodes for improved read performance, doubles network bandwidth for writing to disk, and accelerates synchronous write replications.

An additional benefit of HA load balancing is improved availability in the event of a private link failure.   The system will ride through these faults by communicating over your 10G synchronization links,  or the management link (network0).   Note that this feature should not be enabled unless you have a 10G sync link or can ensure adequate bandwidth on network0.

Special Considerations

HA Load balancing relies on having alternate paths for both data synchronization and VM migration traffic. Avance will always choose a 10Gb synchronization link if it is available, followed by the private link (priv0) and finally the management link (ibiz0). If your system is not configured with 10Gb synchronization links, then it is strongly recommended that ibiz0 is not allocated for VM usage to avoid over-subscription of the network under fault conditions as ibiz0 will carry synchronization traffic after a failure of the private link.

Physical Machine Maintenance Manual

Upgrading Physical Machine Firmware

Update BIOS, BMC, and storage firmware whenever upgrading Avance or performing Physical Machines (PM) maintenance: For instructions:

  1. In the Avance Management Console, click Physical Machines.
  2. Click Help and follow the instructions for Upgrading Firmware.

To view current firmware versions:

  1. In the Console, select a PM.
  2. Click the Details tab.

Recovering a Physical Machine

If a PM becomes unreachable or repeatedly crashes until Avance removes it from service, use the Recover button to re-image the PM and return it to service.

  1. In the Avance Management Console, follow the instructions in Recovering Physical Machines in the online help.
  2. When prompted, select Yes (Recover w/Reformat).

If the problem persists, run your hardware vendor’s diagnostic tools. If no hardware issue is detected, contact your Avance service provider.

Repairing a Physical Machine

These hardware faults let you gracefully shut down a running PM for repair

  • Memory DIMMs exhibiting correctable (non-fatal) errors
  • Fans
  • NICs

These can be repaired with the PM running (see “Adding/Upgrading disks with the PM Running“):

  • Physical disks
  • Power supplies
  • Business Network Cables

In all cases, you can repair the PM without interrupting the virtual machines (VMs).

Restrictions

  • You cannot change the motherboard or RAID controllers.
  • You cannot change existing RAID volume types or order.

Shutting Down a PM

  1. In the Avance Management Console, click Physical Machines.
  2. Select the PM to repair. Click Work On.
  3. When the PM displays running (in maintenance), click Shutdown. Click OK.
  4. Repair the PM as required.
  5. Reconnect all network cables.
  6. In the Avance Management Console, select the repaired PM. Click Power On. Click OK. Avance powers on and boots the PM. When the PM is running, Avance begins synchronizing the PM’s storage ( appears).
  7. On the Networks page, click the Fix button if it is highlighted. This might occur if any network cables were moved on the repaired PM.
  8. Select the repaired PM on the Physical Machines page. Click Finalize. Click OK.
  9. When synchronization ends ( disappears), continue with normal operation.

To avoid data loss, do not power down the primary PM while the disks are synchronizing.


Adding Resources to a Physical Machine

You can add these resources to a PM without interrupting applications (VMs):

  • Higher speed or more CPUs
  • More memory
  • New or upgraded (larger/faster) disks
  • RAID volumes
  • Ethernet ports

For instructions, see “Upgrading or Adding Components,” below. In addition, you can add a single-disk RAID0 or non-RAID drives, or upgrade physical disks, without shutting down PMs. See “Adding/Upgrading disks“, below.

Restrictions

  • All upgrades must follow the Avance Compatibility Matrix for your Avance software version.
  • You cannot change the motherboard or RAID controllers.
  • You cannot change existing RAID volume types or order, but you can add new RAID volumes/disks.
  • Downgrades are not supported.

Adding/Upgrading disks with the PM Running

When adding/upgrading physical disks, plug each disk pair into the same slot number on both PMs. Paired disks are recommended to be the same size and speed.

  1. In the Avance Management Console, click Physical Machines.
  2. Select the secondary PM (not primary). Click Work On.
  3. If upgrading a disk:Remove the old disk.After a moment, Avance recognizes the disk is gone. If the PM reboots, wait until it completes.
  4. Insert the new disk.Avance automatically recognizes the new disk and brings it into service, unless the disk contains data. In this case, Avance marks the disk as foreign and leaves it out of service.

    Activating a disk marked foreign erases all its data.


  5. If the disk is marked foreign: make sure the data is unneeded. Click Activate Diskto erase and bring it into service.When the disk is in service, Avance begins synchronizing the PM’s storage ( appears).
  6. Click Finalize. Wait until synchronization is complete ( disappears).
  7. Repeat for the primary PM.

Upgrading or Adding Components

  1. In the Avance Management Console, click Physical Machines.
  2. Select the secondary PM (not primary). Click Work On.
  3. When the PM displays running (in maintenance), click Shutdown. Click OK.
  4. Upgrade the PM as required. If adding disks to multi-disk RAID arrays, see “Adding disks to an existing or new multi-disk RAID array,” below.
  5. Reconnect all network cables. Do not add cables to any new network ports at this point.
  6. In the Avance Management Console, select the PM. Click Power On. Click OK.Avance powers on and boots the PM. When the PM is running,Avance begins synchronizing the PM’s storage ( appears).
  7. On the Networks page, click the Fix button if it is highlighted. This might occur if any network cables were moved on the upgraded PM.
  8. Select the repaired PM on the Physical Machines page. Click Finalize. Click OK.
  9. Wait until synchronization is complete ( disappears).

    To avoid data loss, do not power down the primary PM while the disks are synchronizing.


  10. Select the primary PM. Click Work On. Avance then migrates VMs to the upgraded PM, and makes that PM primary.
  11. Repeat steps 3 through 9 for the PM in maintenance.
  12. If you added NIC ports, see “Connecting Additional Business Networks” on page 10.

Adding disks to an existing or new multi-disk RAID array When adding new physical disks to both PMs, plug each disk pair into the same slot number on both PMs. Paired disks are recommended to be the same size and speed.

  1. Insert the new disks in the PM, starting at the lowest available slot number. Do not skip slots.
  2. Attach a keyboard and monitor to the PM.
  3. Reboot the PM.
  4. When prompted, enter the RAID BIOS configuration utility:
    Server type Press
    Dell Ctrl+R
    HP F8
    IBM, ICO, Intel, Lynx, Primeline, Seneca, Tarox and Wortmann Ctrl+H
  5. Configure the new disks to an existing or new RAID configuration. See your server documentation for instructions. Save the configuration.
  6. Power off the PM.
  7. Continue with step 5 of “Upgrading or adding other components,” above.

Adding power supplies or fans to Intel server board based systems If additional power supplies or fans are inserted after firmware and FRUSDR flashing on Intel server board based systems then the the Field Replaceable Unit/Sensor Data Record (FRSDR) on the server must also be updated in order for the power and fan sensors to be monitored by the BMC. Refer to the document “How to Update the FRUSDR for Optimum Server Performance” on the Intel website for details. If this is not done then failures in these components might not be detected.

Upgrading to New Physical Machines

You can upgrade to new PMs having compatible CPUs and chipsets without interrupting applications (VMs). Avance warns you if the new PM has incompatible CPUs or chipsets, and if so prompts you to shut down the VMs before the upgrade completes.

Restrictions

  • All upgrades must follow the Avance Compatibility Matrix for your Avance software version. If the PM is supported in a newer Avance release, you must upgrade the Avance software prior to upgrading the PM.
  • New PMs must include the same RAID volume types and order as the original PM, and can have additional RAID volumes/disks.
  • New PMs must have processors from the same processor family in order to support live migration. If the PMs are from different processor families then the VMs must be stopped in order for them to migrate from one PM to the other.
  • New/upgraded PMs must not have fewer physical resources than the original PMs:
    • Number of processor cores
    • Number of drives. Also, drives must be at least as large as the corresponding drives in the original PM, and in the same slot positions.
    • Total memory
    • Total network ports. Each port must support at least the speed of the existing ports. All add-on NICs within a particular PM must have the same vendor/model number.

    Although Avance warns you if a new PM has incompatible or insufficient resources, it’s more efficient to correct issues beforehand.

Procedure

  1. Upgrade Avance software if required to support the new PM. Refer to the Avance Release Notes and the help on the Avance Upgrade Kits page of the Avance Management Console.
  2. Upgrade the secondary PM (not primary). See “Appendix A: Replacing a Physical Machine” .
  3. Repeat for the primary PM. Avance then migrates the VMs to the other PM.
  4. If you added additional NIC ports, see “Connecting Additional Business Networks“.

Replacing Physical Machines or Motherboards

Several classes of hardware faults can hang or crash a PM, such as:

  • Motherboard or mid-plane failures
  • CPU failures
  • Storage controller failures

If this occurs, repair using the Avance PM Replace function. This does the following:

  1. Deletes the defective PM from the Avance unit’s database.
  2. Waits for repaired/replaced PM to power on.
  3. Images the repaired PM and synchronizes its storage from the running primary PM (because the hardware failure may have corrupted the PM’s storage).

Restrictions

  • These components must be the same on the replacement PM as on the original:
    • Vendor and model number
    • Compatible CPUs
    • Storage and network controllers (models/versions)
  • Any RAID volumes (type and order) must be configured identically.
  • The replacement PM cannot have fewer physical resources than the original PM:
    • Number of processor cores
    • Number of drives. Also, drives must be at least as large as the corresponding drives in the original PM, and in the same slot positions.
    • Total memory
    • Total network ports. Each port must support at least the speed of the existing ports. All add-on NICs within a particular PM must have the same vendor/model number.

    Although Avance warns you if a new PM has incompatible or insufficient resources, it’s more efficient to correct issues beforehand. For instructions, see “Appendix A: Replacing a Physical Machine” on page 8.

Appendix A: Replacing a Physical Machine

  1. Prepare the new PM by following steps 2 through 5 (“Configure Networks” through “Configure BIOS”) in the Avance Installation Guide.
  2. In the Avance Management Console, click Physical Machines.
  3. Select the PM to be replaced. Click Work On.
  4. When the PM shows running (in maintenance), click Replace. Avance deletes the PM from the Avance unit’s database, then prompts you to replace the PM.
  5. Press to power off the old PM.
  6. Disconnect and remove the existing PM.
  7. Install the new PM.
  8. Reconnect only the private network (GB1 port for Dell servers, port 1 for others).
  9. Reconnect any 10G networks.
  10. Press  to power on the new PM. To monitor the process of bringing the new PM into service, click Physical Machines.After about 30 minutes, the new PM is imaged and shows running (in Maintenance). Avance then begins synchronizing the new PM’s storage (displays ), which can take several hours.

    To avoid data loss, do not power down the primary PM while the disks are synchronizing.


  11. While storage is synchronizing, reconnect the business links to the new PM.
  12. On the Networks page, click the Fix button if it is highlighted. This might occur if any network cables were moved on the replaced PM.
  13. Select the new PM. Click Finalize.
  14. If the Dashboard warns that the upgraded PM has insufficient resources, repeat the replacement process starting at step 3 above. Correct the PM configuration when Avance completes step 4.
  15. If Avance warns that the upgraded PM is not compatible with the running PM (different architecture), and prevents it from leaving maintenance state:
    1. Select the primary PM. Click Work On.
    2. When VMs shut down, select the upgraded PM. Click Finalize. The VMs restart on the upgraded PM, which becomes the primary.
  16. Check the Avance unit periodically to ensure storage synchronization completes ( appears on the dashboard).

To avoid IP address conflicts, do not attach replaced PMs to the network until you have removed or overwritten the Avance software installation.


Appendix B: Connecting Business Networks

Connecting Additional Business Networks

If you added network ports to the PMs, connect network cables as follows:

  1. In the Avance Management Console, go to the Networks page.
  2. Connect additional network cables to both nodes, a pair at a time. Ideally in the same NIC slot and port number in each server: For each connection:
    1. Wait for the new Shared Network to appear. If it does not appear within a minute or so, it means your cables are on different subnets or the NIC ports between the nodes are not compatible (e.g 10Gb on Node 0 and 1Gb on Node1).
    2. Double click the shared network name and re-name it based on the based on its L3 Lan connectivity: “10.83.0.x” or “Engineering Lab”
  3. Verify the newly formed shared network displays a green check.

Power Monitoring

Power Monitoring Options

Avance provides three ways to monitor power:

No Monitoring Default. Treats PM power supply loss the same as other predictive hardware faults.
Internal Monitoring UPS model independent. Avance initiates a PM shutdown policy if it detects power loss for over 2 minutes.
External Monitoring UPS model dependent. Vendor application executes shutdown policies via an Avance command line interface (CLI) script.

To configure power monitoring:

  • In the Avance Management Console, click Preferences. Click UPS.
  • Select the power monitoring state from the menu.

Determining UPS Battery Requirements Minimum battery capacity in minutes depends on the memory allocated to VMs:

  • 2 to cover short blackouts
  • 3 to shutdown VMs
  • 2 to shutdown PMs
  • Time for VM migrations, equal to { total memory of all VMs (GB) } / 2

For example, VMs with 8GB memory require a UPS battery capacity of 2 + 3 + 2 + (8/2) = 11 minutes.

No Monitoring (Default)

When Avance detects that a PM has lost a redundant power supply, it immediately generates an alert and “live-migrates” VMs from that PM to its partner.

Internal Monitoring

Avance monitors the PM’s redundant power supplies and executes these policies on power loss:

  • Power lost over 2 minutes on one PM: the VMs are live-migrated to the other PM, and then the affected PM is shut down.
  • Power lost over 2 minutes on both PMs: the VMs are shutdown, and then both PMs are shutdown.

Shutdowns cannot be cancelled once begun. Internal monitoring requires redundant power supplies for each PM, with one supply connected to wall power and the other to a UPS:

Single site, shared UPS configuration Split site UPS configuration

External Monitoring

External monitoring is used with a UPS power-management application such APC’s PowerChute Network Server (PCNS). These applications monitor the UPS for low battery and power loss, and can initiate shutdowns. For Avance, the application would execute a shutdown script containing Avance CLI (AVCLI) commands. The power-management application must be implemented in an external client. Avance does not support running a UPS agent directly in the Avance base layer. Avance takes no action when a PM loses power from a redundant supply in this situation, because the application executes the appropriate policy. Avance sends an e-Alert or SNMP trap if enabled, but does not send a call-home. The power-management application can also execute power-up sequences by controlling UPS outputs.

P2V V2V and VM Cloning

Introduction

The Avance high-availability virtualized environment enables you to easily export, import, restore, and migrate virtual machines (VMs), using the Avance Management Console or command-line interface.


Before using the Avance 2.0 software, we recommend becoming familiar with the terms listed in the glossary.


For best performance:

  • Make sure all hardware (client, server, Avance unit, and storage) is on a high-speed (1GbE or more), low-latency network.
  • Before backup/export, make sure the destination disk that will store exported files has free space equal to twice the disk space allocated to the VM. (After the operation completes, the VM needs only its allocated space.)

FROM NON-AVANCE SOURCE

Windows P2V or V2V

Migrating Windows Physical or Virtual Machines from a non-Avance source

Avance 2.0 can migrate Windows VMs from VmWare, Citrix, or Hyper-V into Avance: this is known as “Virtual-to-Virtual” or “V2V” migration.

Avance can also create a VM from a physical Windows system: this is known as “Physical-to-Virtual” or “P2V” machine migration.

Avance attempts to meet the resource specifications of the source VM, but may be limited by the configuration of the destination Avance unit. The migrated VM can also be re-provisioned later as needed.

Windows VM migration uses the tool XenConvert from Citrix.com.

Preparation

Install the 32 or 64 bit version XenConvert 2.1 on the source machine.

Download the Xenconvert client

XenConvert 2.1 32 bit version
XenConvert 2.1 64 bit version

Exporting a multi-volume machine –virtual or physical – requires two steps: convert the boot volume to OVF and VHD format, and separately convert subsequent volumes to VHD format.

Convert the Boot Volume

  1. Start XenConvert on the source machine.
  2. Validate that From: This machine is selected.
  3. Select To: Open Virtualization Format (OVF) Package. Click Next.
  4. Select only the boot volume. Do not select any other volumes, and do not otherwise change this screen.
  5. Click Next.
  6. Enter a path in the Please choose a folder to store the Open Virtualization (OVF) package textbox. Use a new, empty folder.
  7. Make sure the following XenConvert options are disabled. These are not supported, and can prevent a successful import:
    • Include a EULA in the OVF package
    • Create Open Virtual Appliance (OVA)
    • Compress Open Virtual Appliance (OVA)
    • Encrypt
    • Sign with Certificate
  8. Click Next.
  9. Edit the properties if desired to change the name of the OVF file. Click Next.
  10. Click Convert.

Convert Additional Volumes

  1. Restart XenConvert on the source machine.
  2. Validate that From: This machine is selected.
  3. Select To: XenServer Virtual Hard Disk (VHD). Click Next.
  4. Select one volume. Do not select multiple volumes and do not otherwise change this screen.
  5. In the Enter a folder to store the VHD package textbox, enter the path to a new, empty folder.

    XenConvert does not give the option of specifying VHD file names so each VHD must initially be stored in a different folder to avoid over writing of the previous files.


  6. Click Convert. This creates a VHD and PVP file.
  7. Rename the new VHD to give it a new, unique name and move it to the folder with the boot volume OVF and VHD. The PVP file is not used.
  8. Repeat for each additional volume.

Import the Volumes


To import, the selected OVF file (boot volume) and all associated VHD files (additional volumes) must be in the same directory, and no other VHD files can be in that directory.

Windows will only recognize three drives until PV drivers are installed in the VM. See the Avance Management Console online help on the Virtual Machines page for details on installing PV drivers.


  1. Connect the client PC to the Avance unit containing the exported OVF and VHD files.
  2. In the Avance Management Console, click Import/Restore VM.
  3. Select Import a VM.
  4. Follow the onscreen instructions in the Import/Restore VM Wizard. Be sure to make any needed changes to the VM’s configuration.
  5. P2V only:Disable any services that interact directly with hardware. These services are not warranted in a virtualized environment. Examples include:
    • Dell OpenManage (OMSA)
    • HP Insight Manager
    • Diskeeper
  6. V2V only:Disable the following services:
    • VmWare tools
    • HyperV tools

Linux P2V or V2V

Migrating Linux Physical or Virtual Machines from a non-Avance source.

Avance 2.0 can migrate Linux VMs from VmWare or Hyper-V into Avance: this is known as “Virtual-to-Virtual” or “V2V” migration.

Avance can also create a VM from a physical Linux system: this is known as “Physical-to-Virtual” or “P2V” machine migration.

Avance attempts to meet the resource specifications of the source VM, but may be limited by the configuration of the destination Avance unit. The migrated VM can also be re-provisioned later as needed.

Linux VM migration uses the open-source tool G4L.

Setup


The boot volume must exist on the first physical disk.


  1. Make sure the system includes an FTP server with three times the disk space allocated to the Linux VM. (Three backup images are created.)
  2. Install these applications on the source machine:
    • Ncftp
    • Dialog
    • Lzop
  3. Download g4l from http://g4l.sourceforge.net. Click Tar/GZ in the Links box. The file name is similar to g4l-v0.30.devel.tar.gz.
  4. Download the G4L scripts to a G4L subdirectory in the root directory of the computer.
  5. Expand (untar) the file by typing the following command:
    tar –zxvf g4l-v0.30.devel.tar.gz
  6. Proceed to Overview: Migrate the Machine Image below.

Overview: Migrate the Machine Image

Perform these steps as described in the following pages to migrate a physical or virtual machine to a Linux virtual machine on an Avance unit.

  1. Back up the Storage Stack from the source machine to an FTP server.
  2. On an Avance system, use the G4L CD to Create a G4L Staging Virtual Machine.
  3. Restore the Storage Stack to the G4L Virtual Machine from the backup on the FTP.
  4. Modify the Storage Stack on the G4L Virtual Machine to add drivers.
  5. Back up the Storage Stack from the staging machine to the FTP.
  6. On the Avance unit, create a Linux virtual machine with the same specifications as the source machine: number of CPUs, number and size of disks, number of network adapters, and memory.
  7. Restore the Storage Stack to the Linux Virtual Machine from the backup on the FTP server.

This figure illustrates this process.

Back up the Storage Stack

  1. Start G4L by typing the following:
    cd root/g4l/bootcd/rootfs/
            ./g4l
  2. Select Yes and press Enter.
  3. Select RAW Mode and press Enter.
  4. Select Network use and press Enter.

  5. Configure the IP address of the FTP server, the userid and password, and the filename (items D, E, and F, below).
  6. Specify a path for Path to Image directory (item P). This directory is for writing and reading backup files. If the directory does not exist, create or request a directory on the FTP server with the appropriate permissions.
  7. Select Backup and press Enter.
  8. Select the backup drive from the s, hd, and c0d0X disks. Do not select the dm-0, sdaX, hdaX, or dm-X disk.
  9. Check the displayed information. If correct, press Enter.

    The status is displayed while G4L backs up the drive.
  10. Perform steps 7 through 9 for each additional disk. Give each disk a unique file name.
  11. If backing up the storage stack for the first time:continue with Create a G4L Staging Virtual Machine in the next section.If backing up the storage stack for the second time: create a Linux virtual machine on the Avance unit and Restore the Storage Stack to the Linux Virtual Machine from the FTP server.

Create a G4L Staging Virtual Machine

On the staging machine, copy the storage stack to a G4L virtual machine, and make required changes for deploying a Linux virtual machine on an Avance unit. Make sure the configuration of the G4L virtual machine matches that of the source system: number and size of disks, number of network adapters, and memory configuration.

  1. Create a G4L virtual CD on the Avance unit.
    1. Download the G4L ISO file from http://g4l.sourceforge.net. Under Links, select Tar/GZ (images).
    2. Create a virtual CD of the G4L installation CD on the Avance unit as described in the Console online help.
  2. Create a virtual machine on the Avance unit as described in the Console online help.
    1. Enter a name for the VM, and allocate a single CPU and at least as much memory as the source virtual machine.
    2. Under Select a virtual CD or repository as the installation source for your VM, select the G4L virtual CD created in step 1.
    3. Provision the VM with at least the same number and size of disks and network devices as the source virtual machine used.
    4. Continue the VM Creation Wizard. Make sure the VM and physical system properties match.
  3. Continue with Restore the Storage Stack to the G4L Virtual Machine below.

Restore the Storage Stack to the G4L Virtual Machine


A maximum of three drives can be restored using this process.


Make sure the destination VM has enough disk space allocated and available to complete the process.

  1. Use the Avance Management Console to shut down the VM as described in the Console online help.
  2. Select the VM and click Boot from CD.
  3. In the Boot from a CD dialog box, select the G4L VCD. Click Boot.
  4. Press Enter till the console prompt opens. Type .\g4l.
  5. Select RAW Mode and press Enter.
  6. Select Network use and press Enter.
  7. Configure the IP address of the FTP server, the userid and password, and the filename.
  8. Select the backup file created previously, and click OK.
  9. Select the destination drive.
  10. Verify the displayed information, then press Enter.
  11. Repeat steps 8, 9, and 10 for each additional drive to restore.
  12. After restoring all the drives, reboot the virtual machine: select X: Reboot in the G4L window, and press Enter.
  13. Continue with Modify the Storage Stack on the G4L Virtual Machine below.

Modify the Storage Stack on the G4L Virtual Machine

  1. P2V only:Disable any services that interact directly with hardware, such as:
    • Dell OpenManage (OMSA)
    • HP Insight Manager
  2. V2V only:Disable the following services:
    • VmWare tools
    • Hyper-V tools
  3. Download and install the appropriate kernel patches to the G4L virtual machine (staging machine): see “Installing or upgrading kernel patches” in the Console online help.
  4. Change the host name by editing the /etc/sysconfig/network file and changing HOSTNAME line to the desired name.
  5. Change the network settings in the /etc/sysconfig/network-scripts/
    ifcfg‑ethX file:

    • Make sure the HWADDR line is commented out or removed.
    • If using a static IP address, make sure the IP address assigned to the guest is unique.
  6. Modify the /etc/modprobe.conf file to include only the following lines:
    • alias ethX xennet
    • An alias line for every network interface the virtual machine supports. For example, if the machine had three network interfaces, the modprobe.conf file would contain the following:
              alias eth0 xennet
      
              alias eth1 xennet
      
              alias eth2 xennet
      
              alias scsi_hostadapter xenblk
  7. Regenerate the initrd image:
    1. Change to the boot directory (cd /boot).
    2. Find the initrd image name that contains the name of the Avance unit. For example:initrd-2.6.9-55.0.2.EL.xs4.0.1.495xenU.img).
    3. Back up the initrd image using the mv command. For example:mv initrd-2.6.18-92.1.10.el5. avance1xen.img initrd-2.6.18-92.1.10.el5. avance1xen.img.old
    4. Remake the initrd with the xennet and xenblk drivers. For example:/sbin/mkinitrd /boot/ initrd-2.6.18-92.1.10.el5. avance1xen.img 2.6.18-92.1.10.el5. avance1xen –with=xennet –with=xenblk
  8. In the /boot/grub/grub.conf file:
    1. Remove the xen.gz line in the 2.6.*-xen kernel section and change the default to 0.
    2. Change the new kernel entry to kernel instead of module.
    3. Change the new initrd entry to saw initrd instead of moduleFor example:
      Unmodified grub menuModified grub menu
  9. Back up the Storage Stack to the FTP server (page 10.
  10. On the Avance unit, create a Linux virtual machine with one CPU and with the same specifications as the source machine: number and size of disks, number of network adapters, and memory.
  11. Restore the Storage Stack to the Linux Virtual Machine to the FTP server.

Restore the Storage Stack to the Linux Virtual Machine

  1. In the Avance Management Console, shut down the VM as described in the Console online help.
  2. Select the VM and click Boot from CD.
  3. In the Boot from a CD dialog box, select the G4L VCD. Click Boot.
  4. Press Enter until the console prompt appears. Type .\g4l.
  5. Select RAW Mode and press Enter.
  6. Select Network use and press Enter.
  7. Configure the IP address of the FTP server, the userid and password, and the filename (items D, E, and F).
  8. Select the backup file created in the first step, and click OK.
  9. Select the destination drive, verify the information displayed, and press Enter.
  10. Repeat steps 8, 9, and 10 for each additional drive to restore.
  11. After restoring all the drives, reboot the virtual machine: select X: Reboot in the G4L window, and press Enter:

FROM AN AVANCE SOURCE

Exporting a Virtual Machine

The Export process exports a copy of all the chosen volumes along with the VM’s configuration (stored as a OVF file). The OVF file can then be used to Import/Restore the VM image.

The overall export process is as follows:

  1. In the Avance Management Console, select Virtual Machines.
  2. Select the VM.
  3. Shut down the VM (if running).
  4. Click Export/Snapshot.
  5. Follow the onscreen instructions in the Export/Snapshot dialog.

The Throttling Level menu limits the performance impact of the export process on running VMs. See the Console online help for details.


Restoring a Virtual Machine

This is a process where a previously exported VM is restored to its native unit.

Note: You cannot restore to a different unit, the OVF file should have been exported from the same unit. Also, at the time of restoring, you cannot change any of the VM’s resources.


Restoring will completely replaces the contents of the VM.
Fast network connections are strongly recommended.


The overall restore process is as follows:

  1. Connect the client PC to the Avance unit.
  2. In the Avance Management Console, go to the Virtual Machines page.
  3. Click Import/Restore VMs.
  4. Select the VM image to restore.
  5. Follow the onscreen instructions in the Import/Restore dialog.
  6. The image then streams to the PC.
  7. The image then streams to the Avance unit.
  8. The Avance unit then restores the VM.

Cloning

Migrating or Cloning Physical or Virtual Machines from Avance to Avance
Cloning an Avance Windows or Linux VM consists of exporting a “baseline” VM to an image file, then importing that file onto one or more Avance systems to create duplicates of the original VM. This process also allows you to change the VM’s system resources, such as number of processors and memory used.

  1. Windows only:
    1. Make sure all volumes are labelled accurately as outlined in Appendix A: Windows Drive .
    2. Execute the sysprep command.
    3. Shut down the VM.
  2. Export the VM as described in “Error! Reference source not found.” on page Error! Bookmark not defined..
  3. Connect the Avance unit to a client PC having access to the storage containing the exported OVA.
  4. In the Avance Management Console, click Import/Restore VM.
  5. Select Import a VM.
  6. Follow the onscreen instructions in the Import/Restore VM Wizard. Be sure to make any needed changes to the VM’s configuration.The VM auto-starts when the import finishes.
  7. Linux only:Verify the VM hostname and MAC address:
    1. Edit the /etc/sysconfig/network file and change the HOSTNAME line to the desired name.
    2. Change the network settings in the /etc/sysconfig/network-scripts/
      ifcfg-ethX file:

      1. Comment out or remove the HWADDR line.
      2. If using a static IP address, make sure the guest’s IP address is unique.

      See the Red Hat deployment guide for details:

      http://www.redhat.com/docs/en-US/Red_Hat_Enterprise_Linux/5/pdf/Deployment_Guide.pdf

  8. Repeat steps 3–7 for each additional Avance unit.

Appendix A: Windows Drive Labelling

Accurate labelling of Windows drives helps ensure that the drives will be accurately mapped by import or restore. Before using sysprep (for preparing a clone) or XenConvert, make sure each window volume has a unique identifiable label. Note: this process will require administrator privileges. To set a label from the command prompt, type:

CMD>label C:c-drive

You can use the diskpart utility to verify all volume labels:

DISKPART> list volume

After importing, use Disk Manager to reassign the drive letters. The labels assigned before using XenConvert or Sysprep will help identify the drives. For instructions, see the following:

http://windows.microsoft.com/en-us/windows-vista/Change-add-or-remove-a-drive-letter

Glossary

  • AVCLI: Avance command-line interface.
  • Meta-data: Information describing VM characteristics such as number of network adapters, number of disks, memory, and the VM name.
  • OVF: Open Virtual Machine Format. An open standard for packaging and distributing physical or virtual machine data, and containing meta-data for the VM.
  • OVA: Open Virtual Appliance/Application, a compressed format of the OVF.
  • P2V: Physical-to-Virtual. A process that creates VM copy of a physical machine.
  • V2V: Virtual-to-Virtual. A process that converts a virtual machine from one location or type to another.
  • VHD: Virtual Hard Disk format.

Troubleshooting

If an import, export, backup, or restore is interrupted by an event that changes the primary node, the process may need to be restarted. For an import or restore, you may also need to first delete the VM. See the Console online help.

  • Avance release 2.1.2 or later: If a firewall is used between the Avance Unit and the client (where the Avance-portal is accessed), the firewall must open Port 80 / http and Port 443 / https.
  • Avance release 2.1.1 or earlier: If a firewall is used between the Avance Unit and the client (where the Avance-portal is accessed), the firewall must open Port 9080.

P2V or V2V for a Ubuntu VM.

Migrating Ubuntu Physical or Virtual Machines from a non-Avance source.

Ubuntu 12.04 VMs running on VmWare, Hyper-V can be converted to run on Avance: this is known as “Virtual-to-Virtual” or “V2V” migration.    In addition,  it is also possible to convert a Ubuntu 12.04 environment running on a physical server to run on Avance,  this is known as “Physical-to-Virtual” or “P2V” machine migration.    There are tools from both Acronis, as well as Symantec that can perform this task as well as an open-source tool called G4L, which will be described in more detail.

Setup


Avance requires that the boot volume must exist on the first physical disk.   In addition, the conversion process supports a maximum of 3 disks.   In order to facilitate the V2V/P2V migration using G4L both the source machine, and targeted Avance server will require access to an FTP server.      You will need enough disk space to hold your largest disk that is being migrated,  G4l uses Lzop compression so this generally about a 50% compression ration.


  1. Download g4l from http://g4l.sourceforge.net.   Somewhere on this page you will see a “browse all files”,  you will want to download both the ISO,  g4l-v0.43.iso,  as well as the g4l scripts that are contained in the tar file called g4l-v0.43.devel.tar.gz.. Please use only the versions specified in this document, these versions can found on http://http://sourceforge.net/projects/g4l/files/
  2. Download the G4L scripts to a G4L subdirectory in the root directory of the source computer.
  3. Expand (untar) the file by typing the following command:
    tar –zxvf g4l-v0.43.devel.tar.gz
  4. Start G4L by typing the following (assuming it was untared at /root):  /root/g4l/bootcd/rootfs/g4l
  5. Select Yes and press Enter.
  1. Select RAW Mode and press Enter.
  2. Select Network use and press Enter.

  3. Configure the IP address of the FTP server, the userid and password, and the filename (items D, E, and F, below).
  4. Specify a path for Path to Image directory (item P). This directory is for writing and reading backup files. If the directory does not exist, create or request a directory on the FTP server with the appropriate permissions.
  5. Select Backup and press Enter.
  6. Select the backup drive from the s, hd, and c0d0X disks.  It is important to backup the entire disk, with selecting any of its partions.  In the example below this is the “sdA” drive which is a total of ~70GB.
  7. Check the displayed information. If correct, press Enter.

    The status is displayed while G4L backs up the drive.   This may take some time as the copy is generally performed somewhere between 50-70 Mbytes/sec depending on your hardware configuration.
  8. Perform steps 7 through 9 for each additional disk. Give each disk a unique file name.    If disk space is a premium on your ftp server, you can do one disk at a time, after it has been restored on you Avance server then you can delete it and proceed to the next disk.

Create a Ubuntu Virtual Machine Container on your Avance Targer

On the target Avance server,  you need to create a Ubuntu VM as a container.   The key is to insure that the VM container is configured with the same number and size of disks, and number of network adapters.   The number of VCPUs and Memory can be increased or descreased as desired.    Failure to allocate the appropriated disk containers will result in a failed conversion because of lack of disk space.

  1. Create a Virtual CD from the G4l Iso that was downloaded from sourceforge.
  2. Follow the instructions for creating a Ubuntu VM, without following the step to convert it from an HVM to PV guest.  That is the final step after completing the P2V.  Note that this step can be aborted as soon as the VM goes from “installing” to “running” on the Virtual Machine page.
  3. When the VM transitions to “running” it can be safely powered down via the “poweroff” button the virtual machine page.  When it successfully transitions to stop, there will be a “Boot from CD” option.
  4. Now, click “Boot from CD”.   You will be presented with a pulldown, select the G4l iso that you created in Step 1.
  5. Press Enter till the console prompt opens. Type .g4l.
  6. Select RAW Mode and press Enter.
  7. Select Network use and press Enter.
  8. Configure the IP address of the FTP server, the userid and password, and the filename.
  9. Select the backup file created previously, and click OK.
  10. Select the destination drive.
  11. Verify the displayed information, then press Enter.
  12. Repeat steps 8, 9, and 10 for each additional drive to restore.
  13. After restoring all the drives, reboot the virtual machine: select X: Reboot in the G4L window, and press Enter.

At this point you should boot into the Ubuntu VM.   You are almost done, but, there a couple more steps.

  •  If the data disks are mounted in “/etc/fstab” you will have to adjust these mount points.   Note that drives that were presented as either “hdX”, “sdX” or “cd0P0″ are now presented as “xvdX”.
  • P2V only:Disable any services that interact directly with hardware, such as:
    • Dell OpenManage (OMSA)
    • HP Insight Manager
  • V2V only:Disable the following services:
    • VmWare tools
    • Hyper-V tools

At this point, depending on your deployment scenario it may be necessary to change the host name by editing the /etc/sysconfig/network file and ensuring that any static IP addresses assigned are unique.   At this point only the post-installation steps to configure the Ubuntu VM for PV conversion remain.

Avance Performance with 10G NICs

Executive Summary

In Avance software release 2.1, Stratus has implemented support for 10 Gigabit Ethernet NIC’s for the data synchronization link between the two Avance PMs. Avance guarantees consistency of guest O/S (VM) data by replicating it between the local storage attached to each PM. The time required to replicate data between nodes contributes to the total time required to complete each I/O operation performed by a guest O/S. Decreasing the wire-time for replicated data would be expected to yield some performance benefit. If the total disk subsystem throughput exceeds the bandwidth of the replication link, then the replication link can become the performance-limiting factor. This paper describes the conditions under which a faster replication link is likely to translate into improved performance, and offers some metrics which customers can use to decide whether to install 10 Gb cards in their Avance systems.

I/O Read Performance

Avance performs read I/O from the local disks, and does not normally send read I/O data across the replication link. As a consequence, installing a 10Gb replication link will have no effect on read performance. If the nature of your performance bottle-neck or the affected application is mainly related to read operations, this alone would not be a compelling reason to upgrade to 10Gb links.

Enhance Performance – recovery, installation, import operations, synchronization

If the disk subsystem can support write throughput in excess of a 1 Gb private link (~ 100 MBytes/second), certain types of operations will likely benefit from a faster replication link. Operations that result in large, sequential, sustained writes, such as database restores, software installation, and large file copy operations fit this description. Likewise, after a physical Avance node has been powered down and requires resynchronization with the primary node, this operation will proceed up to 10 times faster with a 10Gb replication link. Failover, when Avance needs to migrate running VM’s between nodes is another operation which will benefit from the faster link, because the migration traffic (which flows over the primary 1 Gb private link) will not compete with the replication traffic flowing over the 10 Gb replication link. Use of 10 Gb Ethernet cards can also offer increased system hardware redundancy, since Avance will utilize more than one 10 Gb port for replication, and will fail-over between links if either of them fails.

Performance analysis – a deeper dive

Effect of I/O size on throughput

In addition to the total disk I/O write throughput, the size and quantity of the I/O operations dramatically affects whether a faster replication link will deliver an application performance gain. In general, large, sequential writes will perform better than small, random operations. This is because the latency required to perform network replication is better amortized over large I/O blocks, and the wire-transit time consumes a larger fraction of the total I/O replication time, as compared with smaller I/O sizes.

Applications such as databases, which issue small (8 KB) writes, requiring each one to complete before starting the next, will be much more affected by the replication latency than applications which performs pipe-lined operations, for example a file-server. Replication latency consists of the time required to actually transmit the data over the wire, plus the overhead of moving the data through the guest and host operating systems and protocol stacks. At small I/O sizes the wire-time becomes an insignificant portion of the total latency, so a faster network link offers comparatively little benefit.

In order better to advise customers of the benefit of installing 10Gbit links, Stratus has conducted several types of tests in our labs. The simplest test was a simple write I/O test, performed on a single VM, using the ‘dd’ utility. The graph below shows the results of this test, for several runs. Each colored line shows the total throughput obtained when writing I/O at a given block sizes. The effect of 1Gb 10Gb, and ‘simplex’ links are shown. In this case, “simplex” means that one Avance node is powered off, completely removing the data replication from the I/O path. (Of course, with only one node running, the VM’s and their data are not HA, so this is not a recommended real-world configuration. But it does show us the effective “upper limit” on the speed improvement, assuming an infinitely fast replication operation. Testing with SQL Server workloads shows that Avance’s performance in simplex mode approaches 90 – 95% of bare-metal.) Note that the theoretical upper limit on I/O throughput for a 1 Gb link is approximately 100 MBytes/sec. In fact, the 1 Gb test case shows that a single VM can achieve approximately 75% of this maximum.

We can draw several conclusions from the data shown in the following graph. First, we see that at I/O block sizes below 8K, there is little performance difference between 1Gb and 10Gb links. At a block size of 16 KB, we begin to see a significant improvement due to the 10 Gb link. Another way to read this graph is to look at the total I/O bandwidth at which we see significant performance gains due to the 10 Gb link. Below 35 MBytes/sec (the lower horizontal line), there is little difference between 1 and 10 Gb (note where the purple (1Gb) line crosses the horizontal). Above 50 MBytes/sec, we see almost a factor of two improvement.

Performance scaling improvements with multiple VMs

Some customers run more than one performance-sensitive application on a single Avance system. In these cases we are interested in knowing whether upgrading the replication link will have a benefit for aggregate performance. The table below shows the results of two tests: a file copy test on four Windows VM’s, and a file creation test on five Windows VM’s.

Test 4 VMs file copy 5 VMs file creation
1 Gb 85 MB/sec 95 MB/sec
10 Gb 140 MB/sec 441 MB/sec

Notice that the file copy test over 10 Gb on four VM’s is already performing faster than possible with a 1 Gb link. At the larger number of VM’s, the file creation test over 10 Gb shows that write performance continues to scale well past the maximum 100 MB/sec possible over a 1 Gb link. This data shows how a system running multiple VM’s can benefit from the faster replication link, assuming that the system is capable of saturating a substantial portion of the 1 Gb link in its current configuration. Notice also, that even with five VM’s running a write-intensive operation, the guests are not able to consume even half of the 10 Gb link bandwidth. So the replication link is no longer a performance bottle-neck for this system.

Collecting data from deployed systems

In order to predict whether a particular system may benefit from a faster replication link, we must collect some statistics from the running system. For customers already running or benchmarking Avance, the best place to start is at the Avance U/I. By navigating to the “Statistics” tab of the “Storage Groups” page, the total disk write bandwidth can be determined for each shared mirror. Be sure to un-check the box marked “Disk Read”, since read I/O does not involve the replication link, as mentioned above. By summing the values obtained for each shared mirror, we can determine whether enough replication traffic is being generated to suggest this system may experience a performance boost with 10Gb links.

Looking at application I/O profiles in the VM

In some cases, an application is currently running on bare-metal, and a customer is planning to deploy it on Avance. We can determine which specific applications may benefit from 10Gb links by looking into their I/O profiles. In order to gather this data, we use Windows Performance Monitor, as illustrated in the diagram below. We suggest gathering the average and maximum values for the following statistics:

Be sure to collect the performance counters while the system is under its typical peak load. If several VM’s share similar application profiles, it may suffice to capture the data for a single VM and multiply the numbers by the number of similar VM’s. If VM’s have different application profiles, then performance numbers should be captured for each VM. Now that we have the data collected, we are able to make the following calculations and comparisons:

Disk write I/O throughput

We compute the total disk write I/O throughput as the sum of the File Write Bytes/sec value over all VM’s. We would expect to see a benefit from installing 10G links if this value exceeds 35 MB/second.

Disk write I/O average block size

We also compute the average write I/O block size for a particular VM as the File Write Bytes/sec value divided by the File Write Operations/second. We compare this value to 16 KBytes. If the average write block size is greater than 16 KBytes, then a performance boost is more likely. If the average write block size is less than 8 KB, then a 10Gbit link is unlikely to benefit the performance of this VM’s application. If the average block size falls between 8 and 16 KB, then a performance boost for this application is possible but not certain. (Although an application may perform writes in larger block sizes, the writes may get fragmented by the Avance software, so we cannot be certain about the performance boost.) As larger numbers of VM’s are deployed, the likelihood of performance for applications characterized by small block writes increases.

Database applications

Customers running databases are faced with a more complex situation. Whether a database will be accelerated by a faster replication link depends on the I/O profile of that system. The most straightforward way to predict whether an application will benefit from 10Gb links is to examine the current replication link usage (utilizing a 1Gb link).

Example: SQL Server, six VM’s

The Disk I/O graph shown below shows the behavior of an Avance system with 10Gb links with six VM’s running SQL Server. The initial peak of I/O between 18:05 to 18:10 corresponds to restoring a 1 GByte database. The period of I/O from 18:20 onwards shows the databases responding to queries. Clearly, when restoring data, this system is able to take advantage of the faster replication link. With a 1Gb link the I/O bandwidth would have been throttled back to approximately 75 MBytes/second, so the restore operation would have taken perhaps twice as long. However, under steady usage, this application does not generate a heavy I/O traffic pattern, so the steady-state use case does not benefit from the faster links. Additionally it is known that the average write block size during steady operation is 8 KBytes, which also suggests that the application is not likely to be accelerated by the faster link. Testing in this configuration with a 1 Gb link confirms that the steady state operation did not benefit significantly from the faster link.

Conclusion

Deploying 10Gb replication links in an Avance system will result in faster guest software installation, re-synchronization, and fail-over. Aside from the straightforward cases of large file copy, database restore, or other sustained write-intensive operations, predicting whether an application will benefit from 10Gb replication links requires studying the I/O characteristics of the system. Customers with questions about performance enhancements with 10Gb links are encouraged to observe the I/O utilization statistics in Avance and Windows, and consult the guidelines presented in this paper. Totaling the aggregate write I/O bandwidth across all shared mirrors, or capturing similar data at the Windows O/S level is likely to be the most reliable metric for predicting whether a particular system may experience a performance boost after installing 10Gb replication links. To simplify the decision criterion, the following table can be used as a guideline. Based upon the value obtained for the sum of the shared mirror I/O throughput, consult the following table to determine whether your current utilization falls in to the “green”, “yellow”, or “red”

Throughput Zone Application performance benefit from 10G links?
< 35 Mbytes/sec Green Unlikely
35 – 50 Mbytes/sec Yellow Possible, but uncertain
> 50 Mbytes/sec Red Likely

Networking and Split-Site Considerations

Before Installing your Avance servers it is important to understand the networking requirements, additional attention should be made if your are planning to run a split-site configuration.

General Network Requirements

Both of the physical network ports (one on each node) that make up a shared network on an Avance system must be in the same L2 broadcast domain, without any protocol filtering.  Any and all Ethernet packets sent by one Avance node must not be obstructed or rate limited from being received by the other Avance node either by being routed or switched by any L3 network infrastructure.

Avance relies on full IPv4 and IPv6 protocol access, including IPv4 and IPv6 multicast.  Any obstruction of this traffic will prevent a successful install or will compromise the availability of the Avance deployment.  Avance should never generate more than 10 multicasts per node per second on any one network link.

Private Network Requirements

The first onboard Ethernet port on each node must be connected via a private network.  These ports are usually labeled “GbE1”, “NIC1”, etc on the physical server, and the private network that connects the two Avance nodes is called “priv0”.  The private network must have no other network hosts connected.  The simplest private network consists of a single Ethernet cable (crossover or straight through) that connects the first onboard Ethernet port on each server.  If a single Ethernet cable is not used for the private network, see Split-Site Considerations below for additional requirements.

10Gb Sync Network Requirements

Avance may also use 10Gb Ethernet ports as private sync networks.  Network traffic for storage replication between nodes is sent over these networks if they are present.  The requirements are similar to the Private network, as these networks should have no other network hosts connected other than the Avance end points.  If a single Ethernet cable is not used for any of the sync networks, see Split-Site considerations below for additional requirements.

Business Network Requirements

All Ethernet ports, other than 10G Ethernet ports and the Private Network port (first onboard Ethernet port), are treated as Business Networks, which VMs can use to pass traffic.  In order to ensure that Ethernet traffic flows unobstructed to and from VMs from either Avance node:

  • The switch ports connected to Business Networks must not filter ARP packets including gratuitous ARP packets.  Avance will send gratuitous ARP packets on behalf of guest VMs in order to prompt Ethernet switches to update their port forwarding tables to direct VM traffic to the appropriate physical Ethernet port on the appropriate Avance node.
  • The switches connected to Business Networks must not enable any MAC address security features that would disable the movement of a MAC address from one business link to the matching business link on the other node.  Cisco Catalyst switches, for example, support MAC address security features which must be disabled.

If these requirements are not met, or if the switch does not properly update it’s forwarding table when a VM is migrated from one Avance node to the other, the VM may experience a blackout where network traffic is not properly directed to and from the VM.

Split-Site Considerations

If the Private Network or any 10G Sync Networks pass through any networking equipment (i.e. are not connected by just an Ethernet cable), then the requirements outlined in this section must also be met.

Private Network Requirements

  • Switch ports and/or fiber-to-copper converters connected to the Private Network must be set to auto negotiate Ethernet rates and must also support negotiating to both 100Mb/s and 1000Mb/s speeds.  This is a common configuration error made with split-site deployments.
  • Switches and/or fiber-to-copper converters connected to the Private Network must be non-routed and non-blocking with a round-trip latency that does not exceed 10ms.  Calculate latency at 1ms for each 100 miles of fiber, and around 1ms for each non-routed, non-blocking switch or fiber converter.
  • VLANs used to connect the Private network ports must not add any filtering on any of the network equipment between the two VLAN switch ports that are connected to the Avance unit nodes.

No Single Point of Failure

The path taken between Avance nodes in the Private Network must be physically segregated from the path taken by traffic on the Business Networks.  Avance determines liveness of each node by sending heartbeat communication on the Private Network and the first Business Network (example “GbE2”, “NIC2”, etc of each physical server).  If a single physical device or software service fails which causes traffic on both the Private and first Business Network to fail, the Avance nodes may split-brain.  If Avance nodes split-brain, they will each start and run the guest VMs, which will corrupt the VM data (e.g. which copy is correct?) and will have two instances of the same VM communicating on the Business Networks.