Intel® ESAA Recipe Certification
Last Modified: 04/8/2013 at 7:50 | Release:Introduction/Purpose
This certification sequence should be executed against any new Intel platform that Avance will be shipping on to validate proper operation and configuration. Successful execution indicates that the controllers are recognized by Avance and that the system management is properly configured and cabled. Once the sequence has been completed please send a medium diagnostic to Stratus for additional validation.
Target System
- The unit under test should be configured with any optional network adapters in each Physical Machine (PM).
- The unit under test should include one 10Gb adapter in each PM along with appropriate cabling between the PMs if 10Gb adapters (sync links) are an option.
- The system under test should be configured with redundant power supplies if this is supported.
- A separate test sequence should be run through for each storage controller that might ship with the platform.
- If systems will be shipped with SAS expanders or multiple storage controllers then the system under test should be configured with the expander of multiple controllers installed and sufficient drives so that all controllers have drives connected.
Install and Initial Qualification
- Validate that the system conforms to Intel Compatibility Matrix for Avance.
- Configure and install a two node system according to the instruction in the Avance Installation Guide.
- Log in to the Avance Management Console
- Navigate to the Dashboard page and validate that all active issues are informational
 only. Click ignore on any info alerts after reviewing them. The Unit should now display as Healthy with a green check mark
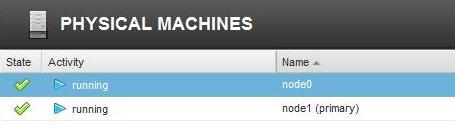
- Navigate to the Physical Machines Page and verify that either the Intel or platform vendor model appears in the Model column for each PM.
Physical and Virtual resource validation
- Click on node0 on the Physical Machines page and select the Details tab. Validate that the storage controller listed is also listed on the Intel Compatibility Matrix for Avance. Repeat this step for node1.
- Validate the physical disk and networks for each PM are recognized and properly configured by clicking on the Storage, Disks, and Network tab for each PM.
- Under RESOURCES on the left hand column, select Storage Groups and validate that all configured logical drives are listed.
- Under RESOURCES on the left hand column, select Networks and validate that all cabled network connections are listed.
Physical Machine Migration of Primary
- Navigate to the Physical Machines page and select the PM listed as primary and click Work On.
- Once the PM is shown as running (in Maintenance), click Finalize to remove the PM from maintenance.
- Validate that the partner node is now the primary node as shown.
Physical Machine Power Fault[1]
- Identify the primary PM via the Physical Machines page.
- Go to the PM and pull a single power cord from the system.
- Validate the Avance recognizes the power loss in the Avance Management Console after a brief delay as follows:
- Primary changes to the partner node
- The Dashboard indicates a problem with the power supply status
- The banner at the top of the Avance Management Console indicates a Moderate Alert.

- Select the faulted PM on the Physical Machines page and click the Sensors tab. Find the power supply sensor and validate that it is listed as faulted.
- Plug the power cord back in. Select the Dashboard and validate that there are no active issues shown after a brief delay.
Physical Machine Management Console Based Power Control
Skip this section the PM is an Intel S1200KP as that platform does not have power control.
- Select either PM and Click Work On to change the activity state of the PM to running (in Maintenance). Click Power Off and then click Yes when prompted to power off the PM. Validate the node shuts off and is listed in the Avance Management Console as off (in Maintenance). The warning icon
 should be next to the Dashboard link in the left hand column.
 - Click Finalize and yes when prompted to power on the PM. Validate that the node powers back on and comes back into service.
- Validate that there are no outstanding issues on the Dashboard.
- Repeat the power control steps on the other PM.
Final Diagnostic
- Select Preferences -> Diagnostics.
- Change the drop-down to select Medium (last 7 days) and click Generate Diagnostic File
- follow the instructions for Uploading a Diagnostic to Avance Support found in the Avance Management Console Help on this page once the diagnostic has completed.
- Send email to Stratus indicating that the a new certification file has been uploaded. Stratus will perform additional analysis on the uploaded file and respond once that has been completed.
[1] Skip this section on systems that only support a single power supply
